

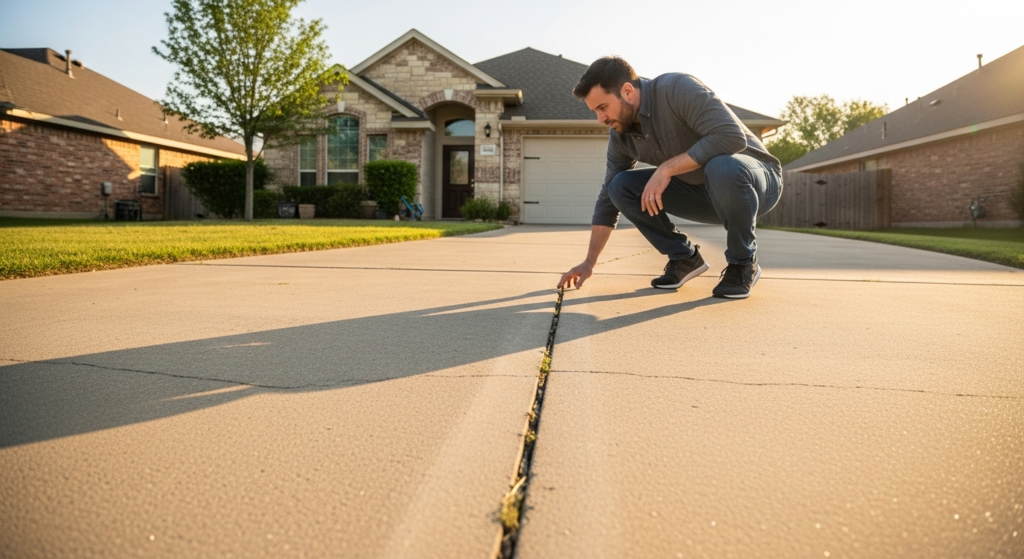
Did you know that a single freeze-thaw cycle can expand a hairline crack by up to 9%, turning a minor surface flaw into a structural problem overnight? If you haven’t taken the time to assess driveway damage after winter this spring, you could be looking at repairs that cost two to three times more than they would have six weeks ago.
Every year, homeowners across Austin, TX and surrounding areas like Round Rock, Georgetown, and Leander discover that winter — even a mild one — quietly attacks concrete and asphalt from the inside out. Water seeps into microscopic surface pores, freezes, expands, and wedges cracks wider with each cycle, weakening the base layer long before damage becomes visible.
In this guide, you will learn exactly how to assess driveway damage after winter using a professional step-by-step inspection method, understand which types of damage can be patched versus replaced, discover the most common mistakes homeowners make, and find out when it is time to call in an expert. Continue reading to protect your investment and restore your curb appeal before small problems become expensive emergencies.
What Does It Mean to Assess Driveway Damage After Winter?
When professionals talk about the need to assess driveway damage after winter, they are referring to a systematic visual and physical inspection of every surface and structural element of your driveway following the cold season. This process goes beyond simply glancing at the surface — it involves checking for cracks, soft spots, drainage failures, edge erosion, and discoloration caused by freeze-thaw cycles, ice, snow, and de-icing salts.
Most driveways in the United States are built to last 10 to 20 years, but neglecting a proper spring inspection can cut that lifespan in half. Concrete and asphalt are both porous materials that absorb moisture, making them especially vulnerable to winter stress. When you assess driveway damage after winter early — ideally in March or April — you give yourself the best window for affordable, lasting repairs before summer heat sets in.
Why Spring Is the Best Time for a Driveway Damage Assessment
Spring is the optimal season to assess driveway damage after winter for three reasons: temperatures are mild enough for sealants and patching compounds to cure properly, the full extent of freeze-thaw damage is now visible, and repair contractors are still available before the busy summer season begins. Waiting until summer often means higher contractor demand, longer wait times, and deeper damage caused by months of unaddressed water infiltration.
Why It Is Critical to Assess Driveway Damage After Winter Every Year
Failing to assess driveway damage after winter is one of the most expensive mistakes a homeowner can make. A crack that measures 1/4 inch wide in April can become a 1-inch fissure by fall if water continues to enter, freeze, and expand inside the gap.
The financial stakes are real. Basic crack filling costs between $0.50 and $3.00 per linear foot, while full driveway replacement ranges from $3,000 to $10,000 or more depending on size and material. Early detection when you assess driveway damage after winter can mean the difference between a $200 repair and a $6,000 replacement.
Beyond cost, an unrepaired driveway poses safety risks — uneven surfaces, potholes, and loose edges are tripping hazards for family members and visitors. Businesses and residential properties in Austin areas like West Lake Hills and Barton Creek have seen property values improve significantly after surface restoration, according to local contractors.
The Hidden Cost of Ignoring Winter Driveway Damage
When you delay the decision to assess driveway damage after winter, you are not just postponing a repair — you are allowing a chain reaction of structural deterioration to accelerate. Water that enters surface cracks migrates into the sub-base, softens the soil beneath, and creates soft spots that eventually collapse into potholes. “Alligator cracking” — the interconnected network of cracks that resembles reptile skin — is the visual sign that the base layer has already failed, and at that point, patching will not hold.
How to Assess Driveway Damage After Winter: Step-by-Step Inspection
Here is a proven 7-step method to fully assess driveway damage after winter like a professional:
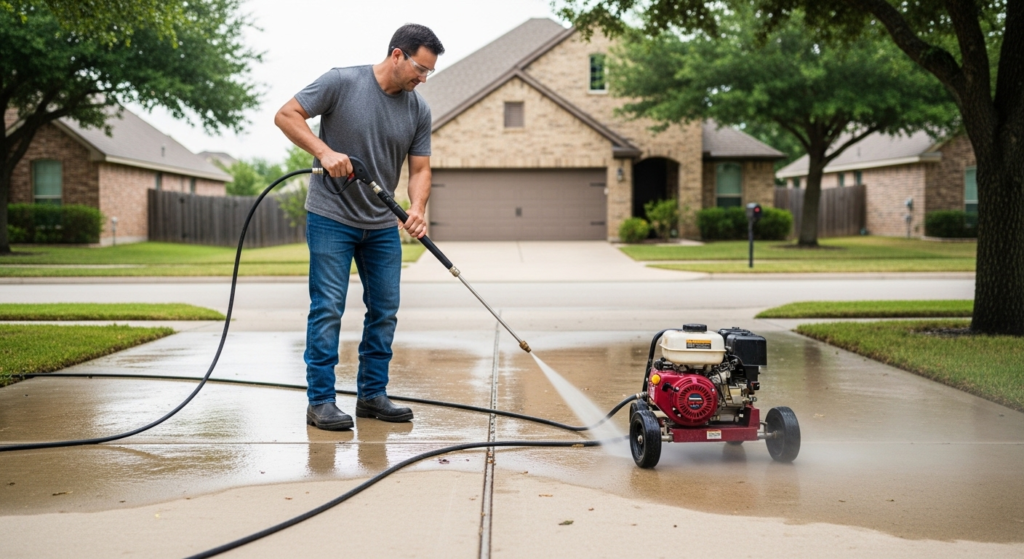
- Clear the surface — Remove all debris, leaves, dirt, and sand before inspecting. A pressure wash reveals surface damage that is hidden under grime.
- Walk the full perimeter — Move slowly along every edge of the driveway and look for crumbling, chipping, or erosion along the borders.
- Identify and measure cracks — Use a ruler or coin to measure crack width. Cracks under 1/4 inch can typically be sealed. Cracks wider than 1/2 inch often require cutting and patching.
- Check for soft spots — Press firmly with your foot across different areas of the driveway. Springy or spongy sections indicate sub-base water damage.
- Look for drainage problems — Watch your driveway during or after rain. Water pooling in the center or near the garage indicates grading failure or blocked drainage channels.
- Inspect for spalling and pitting — Salt-induced spalling looks like surface flaking, white residue, or small pits across the top layer.
- Document everything — Photograph each defect and note dimensions. This record helps contractors give you accurate quotes and helps you track worsening damage over time.
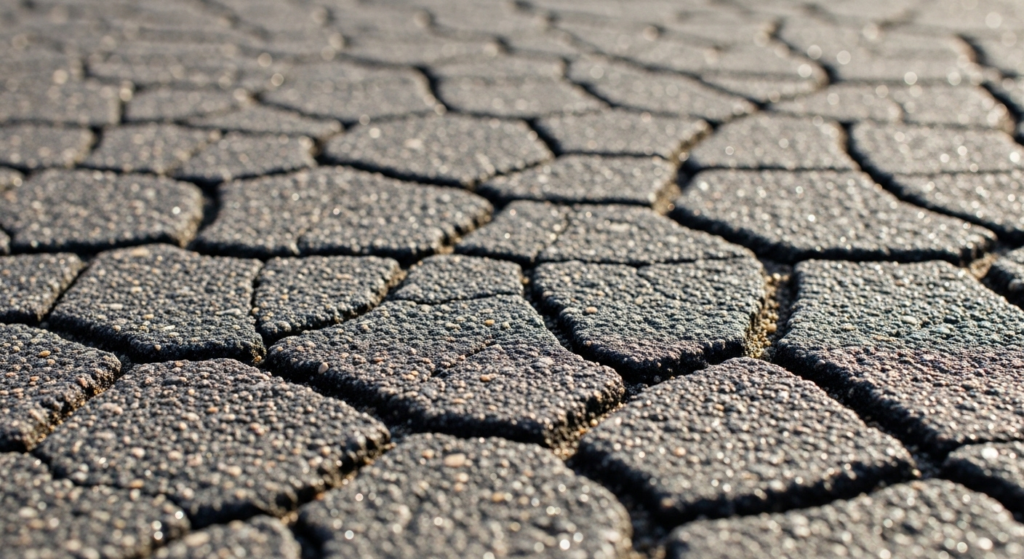
How to Identify the 6 Most Common Types of Driveway Damage
| Damage Type | Visual Sign | DIY Fix? | Professional Fix? |
|---|---|---|---|
| Hairline cracks | Thin surface lines | Yes (sealant) | Recommended for >10 ft |
| Wide cracks (>1/2 in) | Open fissures | No | Yes — cut & fill |
| Potholes | Depressions in surface | Temporary patch | Hot-mix replacement |
| Alligator cracking | Interconnected crack network | No | Section replacement |
| Spalling / pitting | Flaky, rough surface texture | Resurfacer product | Overlay or resurface |
| Drainage failure | Pooling water | Regrade edges | Professional grading |
When you assess driveway damage after winter using this table as a reference, you can immediately categorize each problem and prioritize repairs by urgency and budget.
What Tools Do You Need to Assess Driveway Damage After Winter?
To properly assess driveway damage after winter, you need: a pressure washer or garden hose, a tape measure or ruler, a notepad and smartphone for documentation, a flashlight for shadowed areas near the garage, and a chalk or marking spray to flag damaged zones for a contractor. No specialized equipment is required — the goal of your assessment is documentation, not repair.
Practical Driveway Repair Guide for 2026: DIY vs. Professional Options
Once you assess driveway damage after winter and document your findings, you face a key decision: repair it yourself or call a professional. The answer depends on the type, extent, and depth of the damage.
Not sure whether your driveway needs a simple patch or a full resurface? The team at Rio Epoxy Flooring in Austin, TX offers free inspections. Request your free quote now.
DIY Repairs: When They Work and When They Don’t
Small hairline cracks under 1/4 inch wide and surface-level spalling are the best candidates for DIY repair after you assess driveway damage after winter. A concrete crack filler or asphalt cold-patch product ($15–$30 per bag) can handle minor surface issues effectively when temperatures are above 50°F and rain is not expected for 24 hours.
However, DIY repairs have clear limits. If your inspection reveals soft spots, potholes deeper than 2 inches, alligator cracking, or drainage failure, a professional assessment is essential. Temporary patches on structurally failed driveways create a false sense of security and rarely last more than one season.
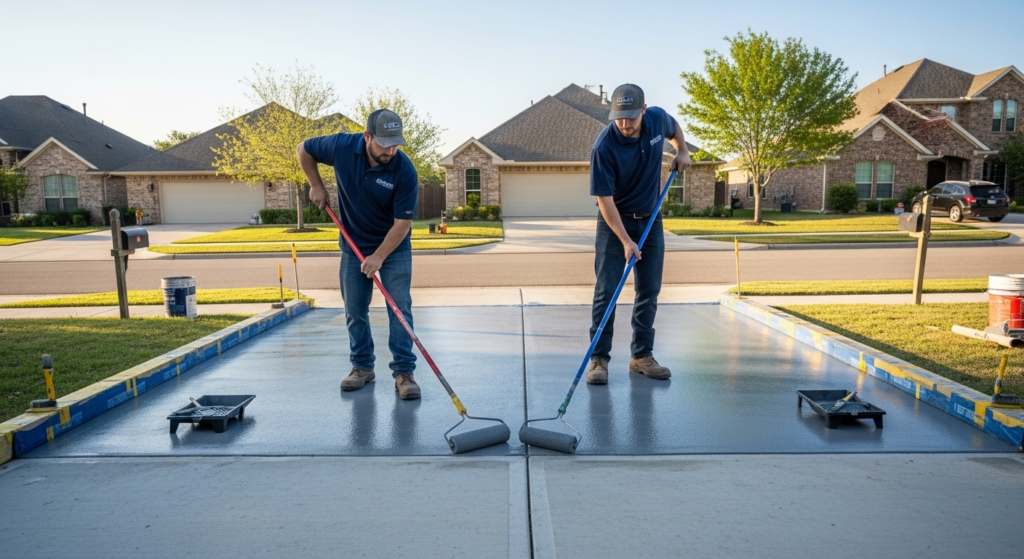
Professional Driveway Repair: What to Expect
When you hire a qualified contractor to assess driveway damage after winter and perform repairs, the process typically includes surface cleaning, crack routing, base layer evaluation, hot-mix patching or section replacement, and optional seal coating. Sealcoating an asphalt driveway every 2–3 years after winter damage repair costs between $0.15 and $0.25 per square foot and significantly extends the surface lifespan.
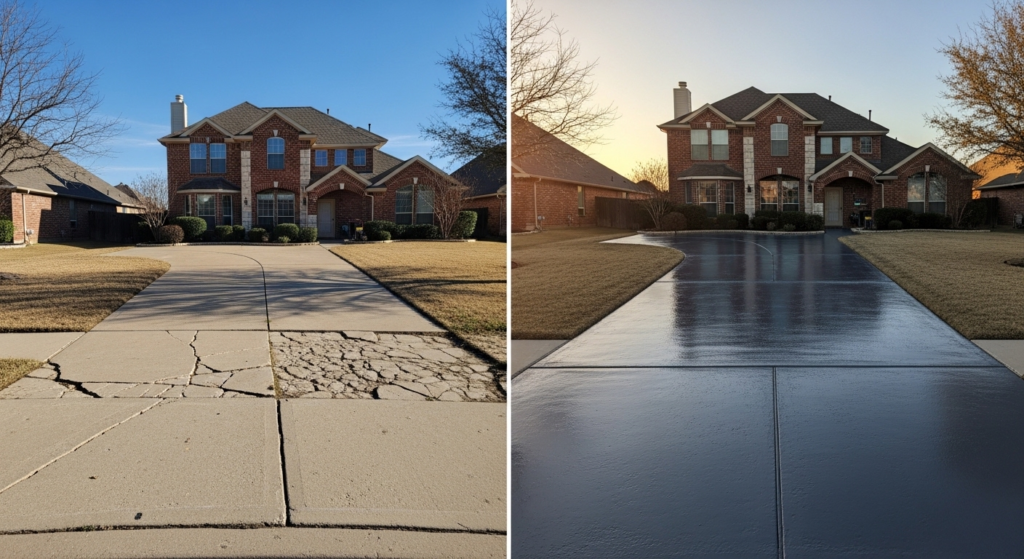
For concrete driveways, residential epoxy flooring solutions can provide an additional protective layer after repairs are completed, sealing the repaired surface against future water infiltration and giving the driveway a clean, professional finish. Rio Epoxy Flooring, based at 823 Congress Ave. Austin, TX 78701, specializes in surface restoration and protective coatings across the entire Central Texas region — from Killeen and Temple to Dripping Springs and Lakeway.
Real Customer Experiences: What Austin Homeowners Say
Nothing validates the importance of a professional assessment better than the experience of real customers. Here are verified reviews from Rio Epoxy Flooring clients who discovered the value of acting fast after winter:
Google Review — Sarah M., Austin, TX:
“I noticed my driveway had cracked badly after the freeze. Rio Epoxy Flooring came out, gave me a clear assessment, and had it looking brand new within a week. Absolutely worth every penny.”
Yelp Review — James T., Round Rock, TX (view on Yelp):
“I kept putting off the inspection and by the time I called, the damage had spread to the garage floor. The team at Rio Epoxy was professional, fast, and honest about what needed to be done.”
Google Maps Review (see location):
“From crack detection to epoxy sealing — the process was smooth and the results were exceptional. My driveway looks better now than when it was first poured.”
These stories highlight a recurring pattern: homeowners who act quickly when they assess driveway damage after winter spend less and achieve better results than those who delay.
Common Mistakes Homeowners Make When Assessing Winter Driveway Damage
Knowing how to assess driveway damage after winter also means knowing what not to do. These are the most frequent errors that lead to wasted money and recurring problems:
- Waiting too long — Every week of delay allows water to deepen into the sub-base, expanding the scope and cost of repairs.
- Using the wrong filler — Applying concrete filler to asphalt or vice versa causes adhesion failure within weeks.
- Sealing before repairing — Applying sealcoat over unrepaired cracks traps moisture underneath, accelerating deterioration.
- Ignoring drainage — Fixing cracks without addressing pooling water means the same damage will return within one freeze season.
- Skipping the sub-base check — A driveway can look smooth on top while the base is completely compromised. Always press-test for soft spots.
- Over-relying on cold patch — Cold-patch asphalt is a temporary fix. It is not a permanent solution for potholes deeper than 2 inches.
When you assess driveway damage after winter with these pitfalls in mind, you dramatically improve the quality of your repair decisions.
Recommended Tools and Products for Spring Driveway Repair
After you assess driveway damage after winter, having the right materials on hand speeds up the repair process significantly. Here are the most effective options for 2026:
For Concrete Driveways:
- Concrete crack filler (polyurethane or epoxy-based) for cracks under 1/2 inch
- Concrete resurfacer for spalling and surface pitting
- Concrete joint caulk for expansion joint gaps
For Asphalt Driveways:
- Cold-patch asphalt for temporary pothole repair ($15–$30/bag)
- Rubberized asphalt crack filler for cracks under 1/4 inch
- Asphalt sealcoat emulsion for full-surface protection every 2–3 years
For Garage Floors and Interior Transitions:
If your winter inspection reveals that damage has extended into the garage, consider a professional-grade garage epoxy flooring solution that protects against moisture, cracks, and chemical spills year-round. Rio Epoxy Flooring offers financing options for qualifying homeowners, making it easier to complete full exterior and interior surface restoration in one project.
For external product research and contractor ratings, trusted resources include HomeAdvisor (external authority link), Angi (external authority link), and Houzz (external authority link).
Seasonal Strategy: When Is the Right Time to Assess Driveway Damage After Winter?
The best time to assess driveway damage after winter is between late March and mid-May, once overnight temperatures consistently stay above 40°F. This window allows repair materials to bond properly and gives contractors lead time before the summer backlog. In Central Texas — including Austin, Georgetown, and Round Rock — the window can begin as early as February due to the region’s milder winters.
Year-Round Driveway Maintenance Calendar
| Season | Action |
|---|---|
| Spring (Mar–May) | Full inspection + crack repair + sealcoat |
| Summer (Jun–Aug) | Monitor for UV surface degradation |
| Fall (Sep–Nov) | Pre-winter sealing + drainage check |
| Winter (Dec–Feb) | Avoid de-icing salts; use sand for traction |
People Also Ask: Driveway Damage After Winter
How do I know if my driveway was damaged by winter?
Walk the full surface in daylight and look for visible cracks, pitting, soft or spongy spots when you step on the surface, uneven sections, and standing water after rain. These are the four primary indicators that you need to assess driveway damage after winter professionally before making repairs.
Can I seal a cracked driveway myself after winter?
You can seal hairline cracks under 1/4 inch wide using a standard concrete or asphalt sealant from a hardware store. However, if the cracks are wider, deeper, or show signs of sub-base movement, a professional evaluation is required before you assess driveway damage after winter and attempt any DIY sealcoating.
How much does it cost to repair a driveway after winter?
Costs range from $50–$300 for DIY crack filling and sealcoating, to $500–$3,000 for professional patching and overlay, to $3,000–$10,000+ for full driveway replacement. The earlier you assess driveway damage after winter, the lower the repair cost will be.
What causes the most driveway damage in winter?
Freeze-thaw cycles are the primary cause — water expands by approximately 9% when it freezes inside surface pores and cracks, physically forcing the material apart. De-icing salts accelerate this damage by drawing additional moisture into the concrete and causing chemical degradation of the surface layer.
Is an epoxy coating good for driveways after winter repair?
Yes. After repairing cracks and restoring the sub-base, an epoxy coating creates a seamless, waterproof protective barrier that prevents future water infiltration. Rio Epoxy Flooring’s residential epoxy flooring solutions are specifically designed for post-repair application on driveways and garage floors throughout the Austin metro area.
Conclusion
Taking the time to assess driveway damage after winter is one of the highest-return maintenance decisions a homeowner can make. From identifying hairline cracks in concrete to catching a failing asphalt sub-base before it becomes a pothole field, a systematic spring inspection protects your property value, your family’s safety, and your renovation budget.
You now know the 7-step inspection method, the 6 most common damage types, when to DIY versus call a pro, and which seasonal window gives you the best repair outcomes. The only step left is to walk your driveway this weekend and put the plan into action.
Ready to assess driveway damage after winter with expert help in Austin, TX? Request your free inspection and quote from Rio Epoxy Flooring — serving Austin, Round Rock, Georgetown, Leander, Killeen, Temple, and all surrounding areas.
Contact Rio Epoxy Flooring today or call (737) 307-1888 — Mon–Sat: 8am–5pm.
You can also explore all our services, learn about our commercial epoxy flooring solutions, or check out our epoxy flooring FAQs before reaching out.
Follow us: YouTube | LinkedIn | Yelp | Google Maps
Rio Epoxy Flooring | 823 Congress Ave. Austin, TX 78701 | (737) 307-1888 | contact@rioepoxyflooring.com | Mon–Sat: 8am–5pm