

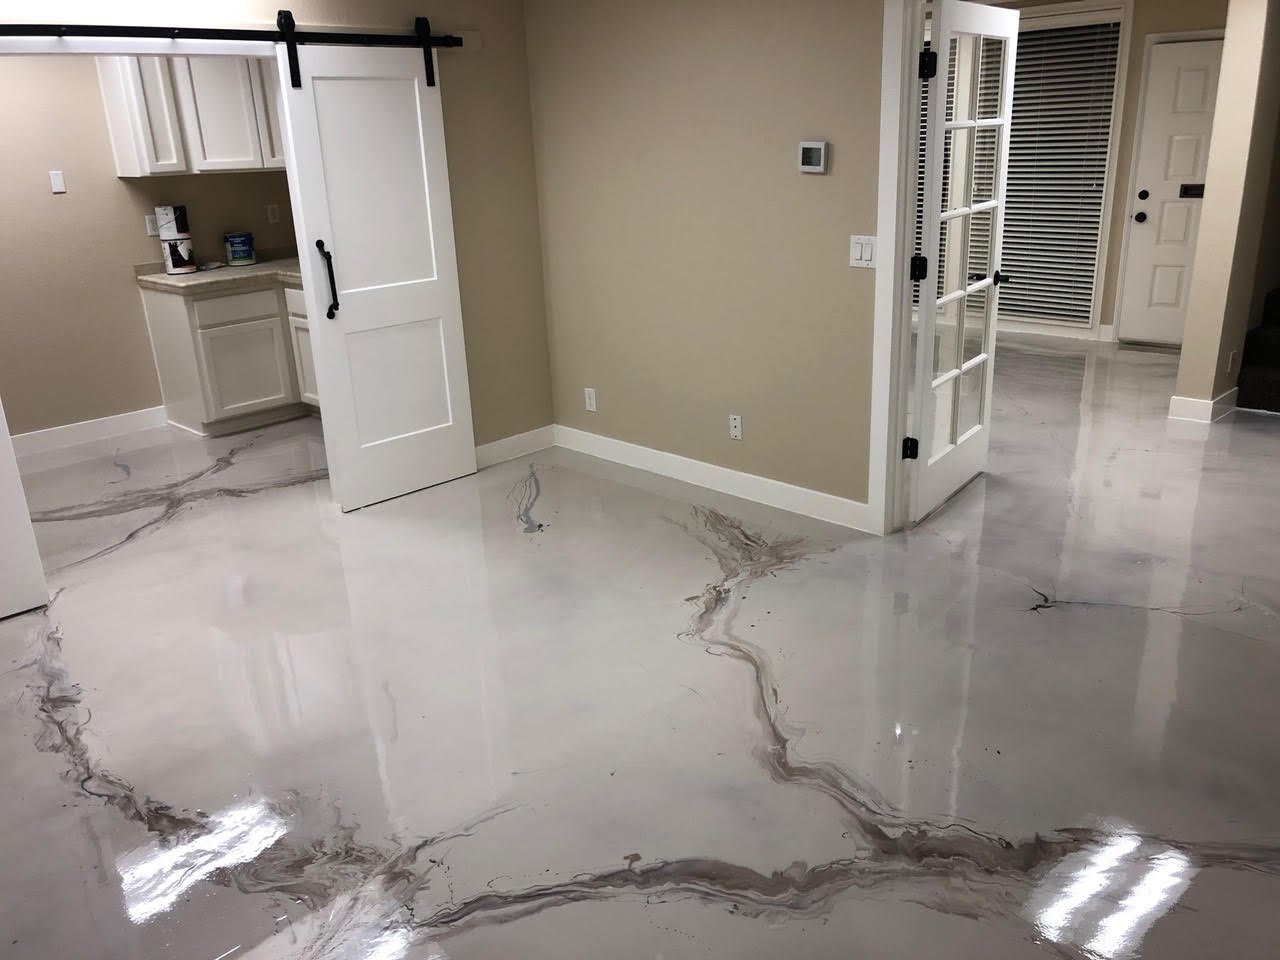
Kitchen Floor Epoxy DIY vs Pro: The Fast Decision Guide
For kitchen floor epoxy DIY vs pro, the right choice usually comes down to floor condition, traffic, moisture, and how long you need the coating to last.
- Choose DIY for a small, dry, low-traffic residential space with sound concrete, a modest finish goal, and time to clean, repair, test, and prepare the slab carefully.
- Hire a professional for active family kitchens, commercial kitchens, damaged concrete, moisture concerns, custom finishes, or any floor where peeling, downtime, and early replacement would be costly.
A basic DIY kit has a lower upfront price, but many consumer products are thinner and less resistant to abrasion, hot spills, and kitchen traffic. DIY coatings may show wear within 1 to 5 years. A properly specified professional epoxy or polyurea system can often last 10 to 20 years with proper care, largely because pros use mechanical grinding, moisture testing, higher-solids materials, and protective topcoats.
The biggest risk is not rolling on the coating. It is preparation. Grease, moisture vapor, weak concrete, skipped grinding, poor mix ratios, and incorrect cure conditions can cause bubbles, peeling, or soft spots. In a food-service kitchen, local health and safety requirements also matter, including cleanability, slip resistance, and indoor-air-quality controls.
I am Roger Aguiar, a Texas-based entrepreneur and digital marketing professional with more than seven years of experience helping small and mid-sized businesses make informed growth and investment decisions. For this kitchen floor epoxy DIY vs pro guide, I focus on the practical factors Austin homeowners and business managers need to weigh before committing to a coating system.

Kitchen Floor Epoxy DIY vs Pro: Key Differences and Comparison
Kitchen floors face aggressive day-to-day demands: dropped cast-iron skillets, boiling oil splatters, constant foot traffic, and frequent scrubbing with cleaning chemicals. When evaluating the pros and cons of epoxy flooring inside a kitchen, it becomes clear that consumer paint kits and industrial floor systems are worlds apart.

A boxed kit from a retail hardware store is typically formulated for simplicity rather than intense durability. Professional systems, on the other hand, are engineered as multi-layered chemical barriers designed to bond deep into the concrete pores. Understanding how DIY and professional methods diverge helps illuminate the real-world gap between these two approaches.
| Comparison Factor | DIY Kitchen Epoxy Kit | Professional Kitchen Epoxy System |
|---|---|---|
| Material Formulation | Water-based or low-solids epoxy (30%–50% solids) | 100% solids epoxy, polyurea, or cement urethane |
| Average Lifespan | 1 to 5 years | 10 to 20+ years |
| Surface Prep Method | Chemical acid etching or basic hand sanding | Industrial diamond grinding or shot blasting |
| Moisture Testing | Rarely included (often plastic sheet test) | Quantitative testing (calcium chloride / RH probe) |
| Cure Time to Foot Traffic | 48 to 72 hours | 24 to 48 hours (or 24 hrs for fast-cure polyaspartics) |
| Impact & Heat Resistance | Low to Moderate (susceptible to hot liquids) | High (handles hot washdowns, dropped cookware) |
| VOCs & Odor | Variable (often high solvent smell) | Low-VOC, ultra-low odor indoor formulations |
| Warranty | None on installation labor | Comprehensive multi-year or lifetime warranties |
Durability and Lifespan: Kitchen Floor Epoxy DIY vs Pro
Durability in a cooking environment comes down to film thickness, tensile bond strength, and resistance to thermal shock. When hot water or grease hits a standard DIY coating, the rapid temperature swing can cause the thin resin layer to expand faster than the underlying concrete slab, leading to micro-cracking and eventual delamination.
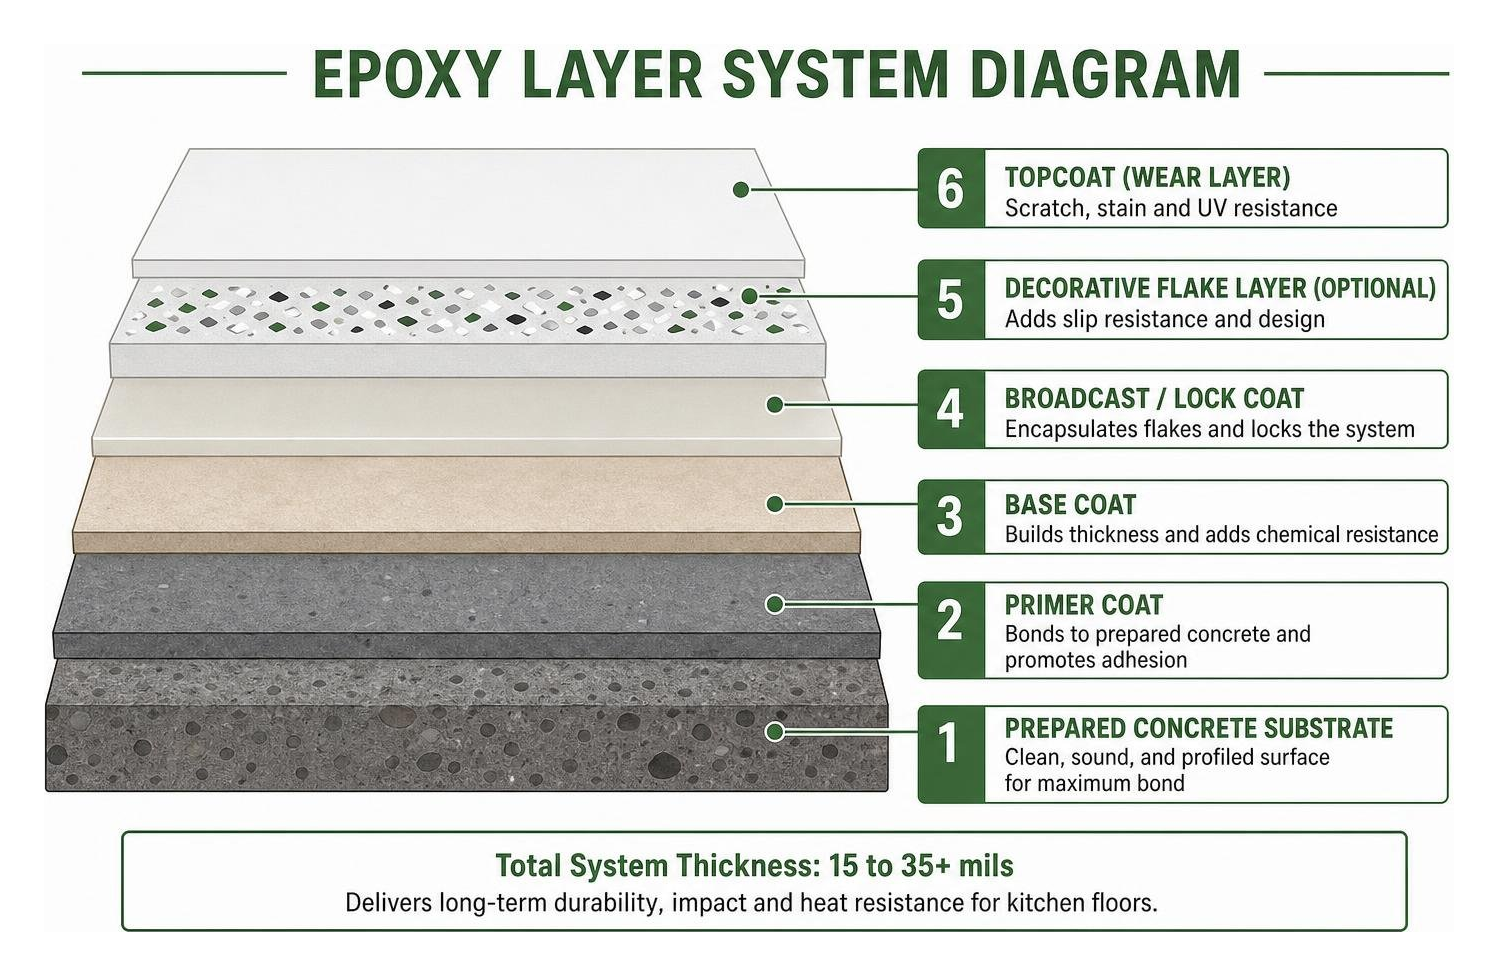
DIY coatings often apply at a dry film thickness of only 3 to 5 mils. As industry analyses from DIY vs Professional Epoxy Flooring: What Really Delivers Better Results — WriteUpCafe point out, DIY coatings may only last 1 to 3 years under continuous friction before wearing thin around dishwashing stations and stove lines. In contrast, our professional installations typically range from 15 to 35+ mils in thickness, providing a resilient cushion against impacts and high-temperature spills that routinely extends performance across 10 to 20 years.
Material Quality: Water-Based Kits vs 100% Solids Systems
The chemical formulation dictates everything from scratch resistance to stain defense:
- Water-Based Epoxy Kits (DIY): These consumer products contain 40% to 60% water or solvents. As the coating dries, the liquids evaporate, leaving behind a remarkably thin film. While easy to roll on and wash off your hands, this thin layer lacks structural density.
- 100% Solids Industrial Epoxy: This system contains zero evaporative carriers. Every ounce poured onto the slab cures into dense, cross-linked polymer chains that seal against oils, food acids, and moisture intrusion.
- High-Performance Resins: For demanding culinary settings, hybrid solutions like cement urethane handle punishing thermal shock from commercial dishwashers, while polyurea topcoats deliver superior UV stability and scratch resistance that outlast standard paint store coatings by decades.
Surface Preparation and Safety in Kitchen Environments
The longevity of any resin floor is determined before the can of epoxy is even opened. In a kitchen, concrete slabs absorb years of microscopic grease, cooking oils, animal fats, and moisture. If you paint or roll epoxy over contaminated or unprepared concrete, the resin will adhere only to the surface grime—peeling off the first time a chair drags across it.
Mechanical Profiling vs Chemical Acid Etching
Most boxed DIY kits supply a small packet of muriatic acid or citric acid crystals to etch the concrete. Acid etching is unpredictable:
- It relies on water, which introduces deep moisture into a kitchen slab.
- It neutralizes unevenly, frequently leaving dense, un-profiled slick spots where epoxy cannot grip.
- It cannot remove embedded cooking grease, oil stains, or existing sealers.
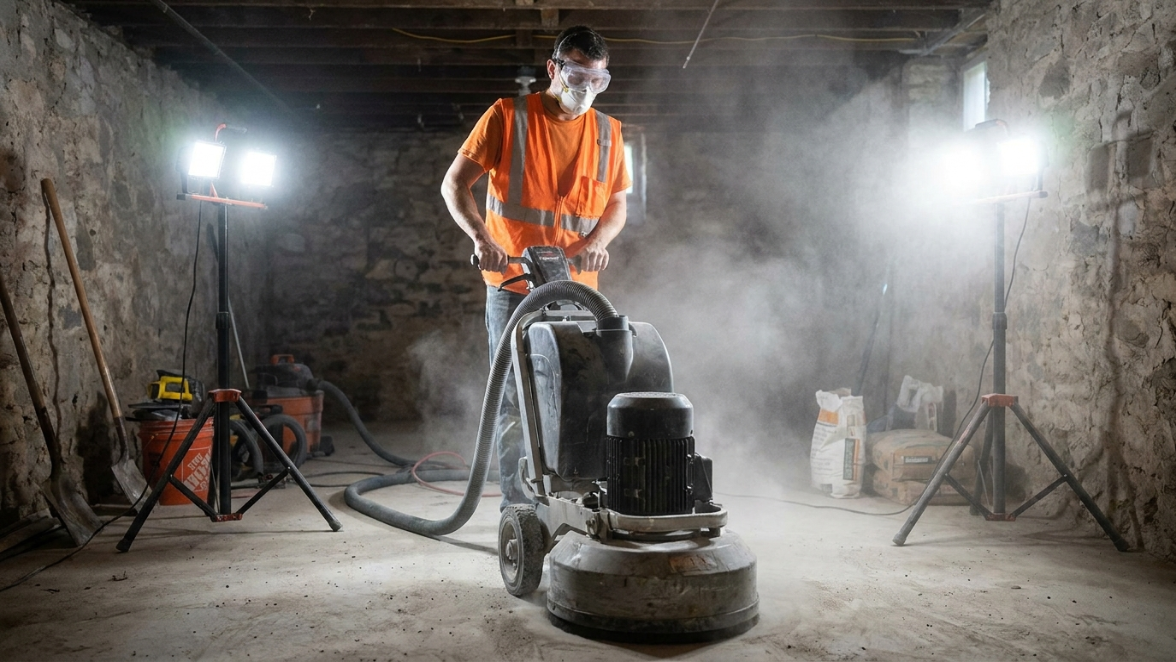
Professionals rely entirely on mechanical profiling. We use heavy, planetary diamond grinders equipped with integrated HEPA dust-extraction systems. Grinding physically removes the top, contaminated layer of concrete, exposing pristine aggregate and opening up microscopic pores. This achieves an exact Concrete Surface Profile (CSP 2 to CSP 3)—giving the 100% solids primer an anchor profile it can chemically and mechanically lock onto permanently.
Indoor Air Quality, Low-VOC Standards, and Health Code Compliance
Safety inside residential and commercial food preparation areas is paramount. Standard consumer solvent-borne paints emit strong volatile organic compounds (VOCs) that can permeate cabinetry, HVAC ducts, and even ruin stored food items.
Understanding the low VOC epoxy flooring benefits is essential when renovating indoor living spaces. We utilize advanced, low-VOC, virtually odorless formulations that eliminate harsh fumes, ensuring your indoor air quality remains safe during and after the installation.
Furthermore, health department codes for commercial restaurants require seamless, non-porous surfaces that prevent bacterial harboring along grout lines. Safety regulations also demand adequate traction. Homeowners frequently ask are epoxy floors slippery when wet; professional systems solve this by broadcasting slip-resistant aluminum oxide or textured vinyl chips directly into the build coat, maintaining sanitary cleanability while keeping staff and family safe from slips.
Total Cost Analysis and Timeline Breakdown
When comparing the finances of a kitchen floor makeover, looking only at the retail price tag of a DIY kit creates a false sense of savings. A thorough budget must account for equipment rentals, preparation materials, safety gear, and the potential cost of having to grind off a failed installation later.
Cost Analysis: Kitchen Floor Epoxy DIY vs Pro Breakdown
A standard boxed DIY kit costs between $100 and $300. However, executing a proper DIY project requires:
- Diamond grinder or scarifier rental ($150 to $300/day)
- HEPA dust shroud and vacuum rental ($100/day)
- Moisture barrier primers and crack repair fillers ($150 to $300)
- Application squeegees, spiked shoes, rollers, and PPE ($100 to $200)
A properly executed DIY project quickly climbs to $1,500 to $2,200 in materials and specialized equipment rentals. If the DIY floor fails due to trapped moisture or grease contamination, professional remediation (grinding off the rubbery, failed epoxy) typically adds $3 to $5 per square foot on top of the standard installation rate.
Professional epoxy installations for residential kitchens generally range from $5 to $12 per square foot depending on the system, while heavy-duty commercial restaurant kitchen installations average around $8 to $15 per square foot (including mechanical prep and integral cove base work). Over a 15-year period, the cost-per-year of a professional floor is significantly lower than replacing or patching DIY kits every 2 to 4 years.
Project Timelines and Curing Downtime
Time is often the most critical factor in a kitchen renovation:
- The DIY Timeline: Preparation, acid etching, waiting days for the wet concrete to dry out completely, applying coats, and waiting for standard water-based resins to cure typically puts your kitchen out of service for 5 to 7 days.
- The Professional Timeline: An experienced crew completes diamond grinding, moisture mitigation, base coating, decorative broadcasting, and clear protective topcoating with rapid efficiency. At Rio Epoxy Flooring, our fast 48-hour installations allow homeowners and restaurant operators to return to full service rapidly, minimizing kitchen downtime without sacrificing bond strength.
When to Choose DIY vs Hiring a Professional Installer
Both approaches have their place depending on the scale of your space, budget, and performance requirements.
When a DIY Kitchen Floor Coating Makes Sense
A DIY approach can be an enjoyable weekend endeavor if:
- The space is a small walk-in pantry, utility closet, or low-traffic secondary kitchenette.
- The concrete is relatively new, completely dry, and has never been contaminated by cooking oil or grease.
- You have basic mechanical hand-tool skills and access to proper PPE.
- You understand that the floor will likely require touch-ups or recoating within 2 to 5 years.
When Hiring a Pro Is the Smarter Investment
Hiring an experienced contractor is by far the superior choice when:
- You are remodeling an active residential kitchen, open-concept living area, or busy restaurant.
- The concrete slab has existing cracks, previous coatings, or oil contamination.
- Moisture vapor emissions are present in the concrete foundation.
- You require seamless cove bases that run 4 to 6 inches up the wall to satisfy health inspectors.
- You want specialized architectural aesthetics, such as our seamless epoxy flake flooring commercial kitchens or custom metallic artistic systems.
Frequently Asked Questions About Kitchen Epoxy Floors
What causes DIY kitchen epoxy floors to peel or bubble?
The two leading culprits are trapped moisture vapor and grease contamination. When concrete breathes, unmitigated moisture vapor pushes upward against the impervious epoxy film, causing blisters and peeling (osmotic delamination). Additionally, if cooking oils are not mechanically ground out of the concrete pores, the epoxy cannot achieve a physical grip on the slab.
Are epoxy floor fumes safe inside residential and commercial kitchens?
Consumer solvent-based paints produce strong chemical fumes that require extensive masking and air scrubbing. Professional installations using 100% solids, eco-friendly epoxy and polyurea systems emit ultra-low VOCs, making them safe for occupied homes and commercial food environments without tainting ingredients or air ducts.
Can epoxy be applied directly over kitchen tile?
Yes, but only with rigorous mechanical preparation. The glazed finish on ceramic or porcelain tile must be diamond-ground to create a rough, abraded surface. Grout lines must be cleaned, degreased, and filled with an epoxy patching compound before applying a high-adhesion bonding primer to prevent grout lines from telegraphing through the final finish.
Conclusion
A kitchen floor must be tough, hygienic, beautiful, and built to withstand decades of spills, heat, and foot traffic. While a DIY kit offers a low entry cost for small utility closets, professional installations provide unmatched longevity, structural adhesion, and peace of mind.
At Rio Epoxy Flooring, we specialize in high-performance resin solutions built for Central Texas homes and businesses. Our family-owned company provides rapid 48-hour installations, low-VOC formulations, and lifetime warranty protection. If you are planning an upgrade, schedule a consultation with our team for your residential project or explore our dedicated systems for epoxy flooring for commercial kitchens to get a long-lasting, flawless foundation for your space.