

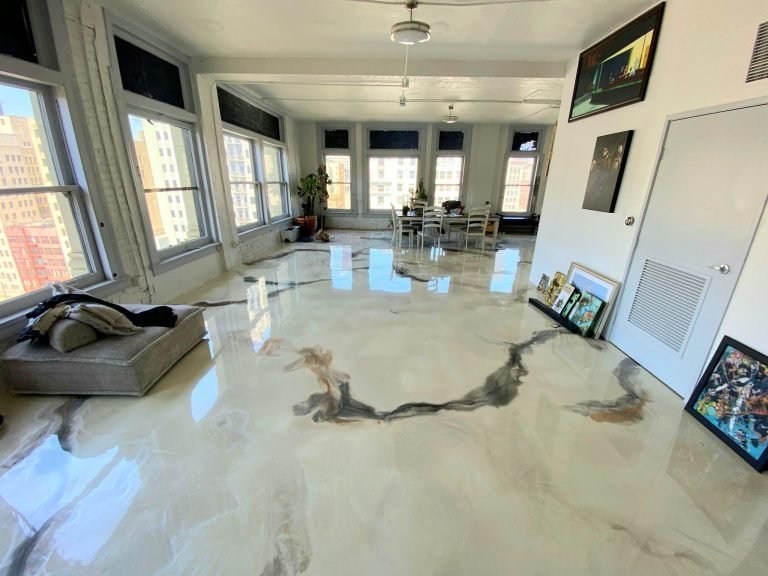
Trending Epoxy Floor Design for Home Aesthetics in 2026
Modern interior architecture leans heavily into continuity, light reflection, and tactile simplicity. As we move through 2026, residential flooring has evolved past traditional boundaries. Homeowners are no longer limited to standard hardwood planks or tiled grids that trap dirt in porous grout lines. Today’s bespoke residential epoxy flooring solutions allow you to turn an entire ground floor into a cohesive, artistic canvas that complements minimalist cabinetry, mid-century furniture, or industrial architectural accents.
The real magic of contemporary resin lies in its adaptability. By manipulating dynamic mica pigments, specialized tints, and protective sheen levels, we can create optical depth that mimics natural stone, poured polished concrete, or flowing liquid metal. Whether you want an expansive, sun-drenched living room that reflects daylight across a mirror-like surface or a muted, velvety slate-gray kitchen, modern resin formulations deliver unmatched aesthetic versatility without sacrificing durability.
Metallic Swirls and Deep Liquid Marbling
If you want your floor to serve as the signature centerpiece of your home, metallic resin systems provide dramatic visual depth. These systems use fine metallic powders dispersed within clear 2K epoxy. As the resin flows and self-levels, the pigments settle into natural eddies, ribbons, and ripples that catch the light from different angles, creating a genuine three-dimensional illusion.
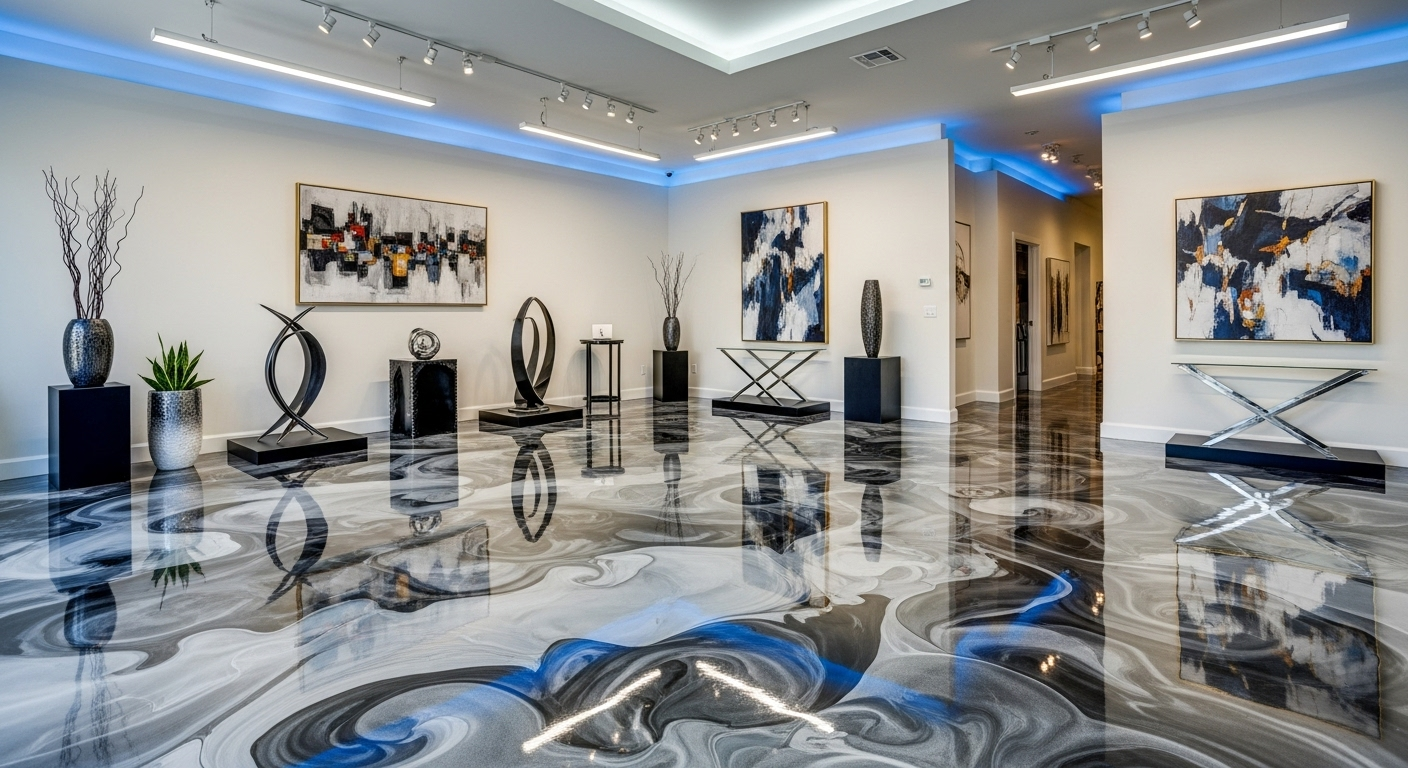
When exploring the top 10 metallic epoxy floor ideas, several two-tone and three-tone combinations consistently lead modern interior trends:
- Titanium and Pearl: A bright, luminous pairing that bounces ambient light throughout open-concept living spaces, delivering a sleek, modern gallery aesthetic.
- Silver and Gunmetal Veins: Designed to replicate dramatic Italian marble, this look uses a high-contrast base and accent pour to achieve organic movement without artificial pattern repeats.
- Copper, Brass, and Pearl: A warmer palette that pairs naturally with walnut cabinetry, brass fixtures, and earthy interior textiles.
- Deep Black and Pearl White: A high-contrast, luxurious composition poured in a 90/10 ratio to produce deep liquid marbling, reminiscent of natural obsidian.
To achieve these organic patterns, we use premium multi-component self-levelling formulas. Precise pigment ratios, controlled working times, and careful installer technique allow deep base colors and bright pearl highlights to flow together into striking, salon-grade marble effects on indoor concrete.
Solid Neutrals and Subtle Glitter Top Coats
Not every interior demands high-contrast marbling. In many minimalist and Scandinavian-inspired spaces, a clean, uniform neutral tone creates a calm, grounding backdrop. Solid pigmented floors in tones like RAL 7015 (Slate Grey) or warm greige provide a smooth foundation that visually expands smaller floor plans.
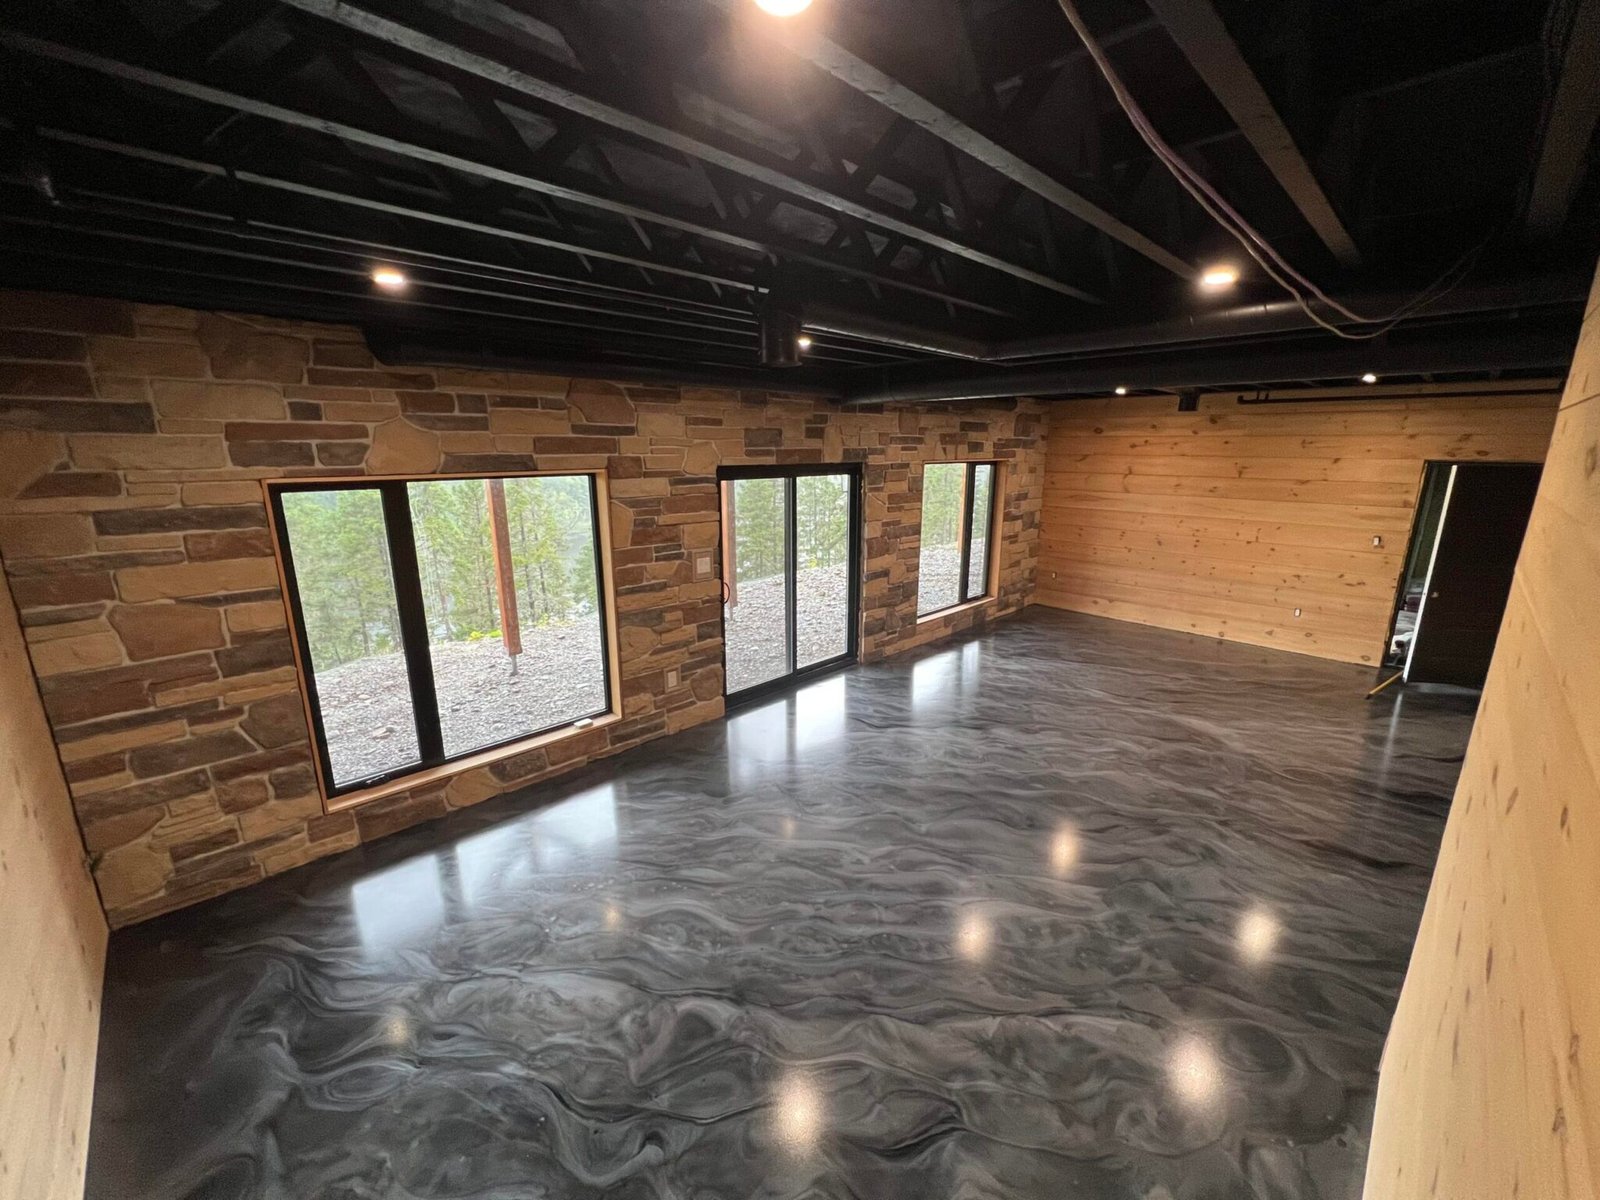
To elevate a solid color without overwhelming the room, we often integrate a 1% glitter top coat. This specialized polyurethane top layer suspends microscopic reflective flakes across the surface. In soft ambient lighting, the floor appears completely smooth and satin-matte. When morning sunlight streams through patio doors or recessed spotlights turn on in the evening, the floor reveals a subtle, sophisticated shimmer.
This technique works especially well when a problematic screed needs to become a unified, light-catching living space. You can see similar transformations across our own residential epoxy flooring transform every room projects, demonstrating that subtle textures often create the strongest architectural impact.
Tailoring Your Epoxy Floor Design for Home Kitchens and Wet Rooms
Modern floor plans frequently unite cooking, dining, and utility spaces into open layouts. Traditional transitions–such as moving from hardwood in the dining area to cold ceramic tile in the kitchen–break sightlines and introduce weak points where moisture collects.
A seamless decorative epoxy floor eliminates transition strips entirely. In high-spill zones like kitchens, pantries, and laundry areas, the non-porous resin surface prevents oils, wine, and water from penetrating the substrate. The same principle applies when updating utility spaces or lower levels; exploring epoxy basement floors benefits costs designs reveals how seamless moisture barriers protect home foundations against damp conditions while keeping open-concept floor plans visually consistent.
Key Benefits of Decorative Resin Over Traditional Flooring
Homeowners weighing their remodeling options often ask why they should choose resin over established materials like large-format porcelain tile, engineered hardwood, or natural stone. Evaluating the pros and cons of epoxy flooring comes down to four core performance factors: seamless maintenance, thermal efficiency, structural resilience, and design freedom.
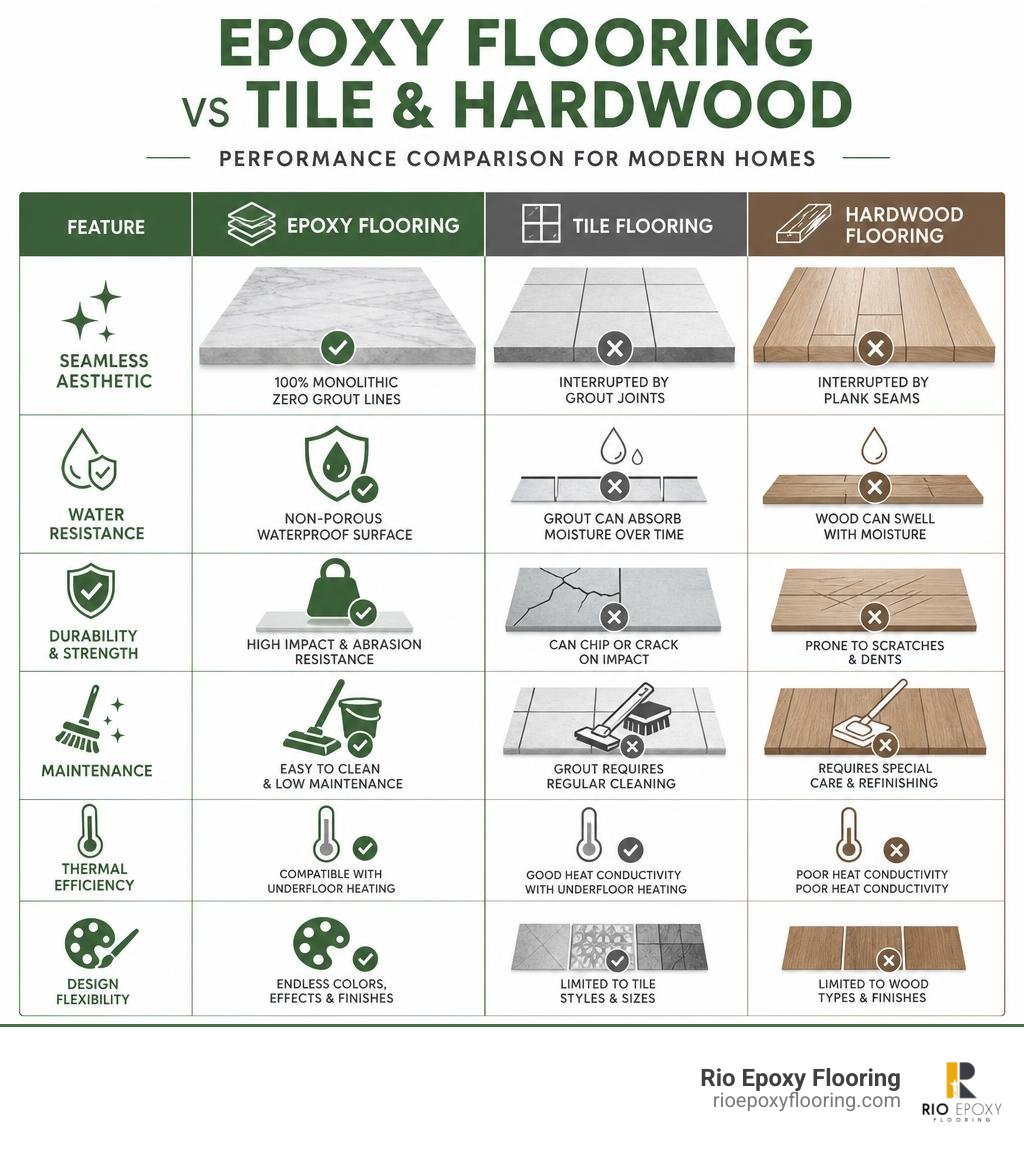
Performance Comparison: Decorative Epoxy vs. Traditional Materials
| Feature / Metric | Decorative 2K Epoxy System | Large-Format Porcelain Tile | Engineered Hardwood |
|---|---|---|---|
| Seamless Aesthetic | 100% monolithic; zero grout lines across rooms | Interrupted by 2–4 mm grout joints | Interrupted by plank seams and t-moldings |
| Cleaning & Hygiene | Microfiber sweep and pH-neutral damp mop | Requires periodic grout scrubbing and sealing | Vulnerable to moisture damage and warping |
| Underfloor Heating | Excellent thermal transfer; expands naturally | Good transfer, but mortar beds can crack | Poor conductor; prone to drying and gapping |
| Total System Build | Approx. 1.8 mm (primer to topcoat) | 10–15 mm (including thin-set mortar) | 12–19 mm (plank plus underlayment) |
| Impact Resistance | Resilient resin flexes under minor impacts | Brittle; dropped heavy cookware can chip tiles | Soft surface; easily dented, gouged, or scratched |
| Design Customization | Unlimited: bespoke pigments, metallics, sheens | Limited to available factory production runs | Limited to wood species and surface stains |
One of the standout benefits of modern resin is its full compatibility with underfloor heating systems. Because a completed decorative system has a slim profile of roughly 1.8 mm, it acts as an efficient thermal conductor. Heat radiates upward into the room quickly and evenly, without being trapped beneath thick timber subfloors or heavy mortar beds.
The Multi-Step Professional Installation and Substrate Prep Process
Achieving a flawless, glass-smooth epoxy floor requires careful preparation. The finished resin coating is only as stable as the concrete or screed beneath it. At Rio Epoxy Flooring, we emphasize precision at every stage of the installation.
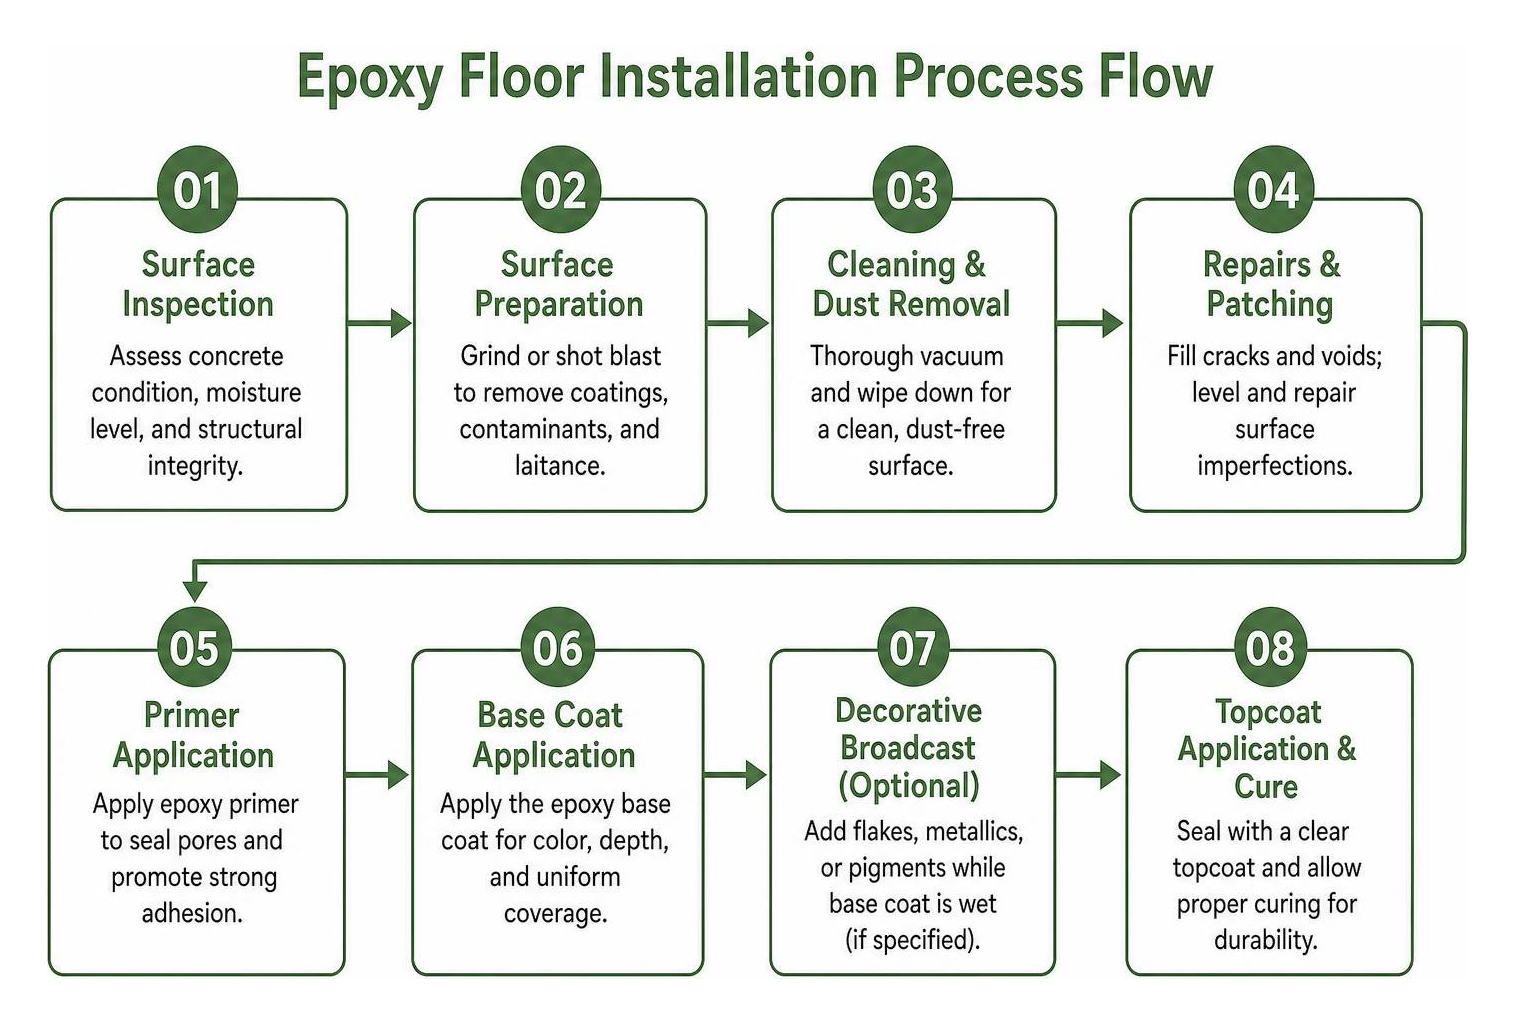
Understanding the complete sequence outlined in our epoxy flooring installation guide Texas helps explain why professional tools and methods are essential for long-term adhesion.
Mechanical Grinding and Subfloor Defect Repair
The most common reason residential DIY coatings fail is inadequate surface preparation. Concrete screeds naturally accumulate a weak, powdery top layer known as laitance. Pouring resin over untreated laitance causes the coating to peel away under foot traffic.
- Planetary Diamond Grinding: We run heavy planetary diamond grinders across the entire floor to remove surface contaminations, open concrete pores, and create a concrete surface profile (CSP 2 to 3) that provides a mechanical key for the resin.
- Edge and Detail Work: Hand grinders fitted with dust-shrouded diamond cups profile perimeters, corners, and door thresholds.
- Defect Extraction: High-efficiency HEPA vacuums pull concrete dust out of deep pores, hairline cracks, and surface pinholes.
- Epoxy Mortar Patching: Gaps, perimeter expansion voids, and structural cracks are filled using high-strength epoxy repair mortars. Pinholes must be sealed to prevent trapped subfloor air from outgassing and bubbling through the self-levelling pour.
Priming, Self-Levelling Pours, and Top Coat Curing
Once the substrate is clean, level, and structurally sound, the resin installation proceeds layer by layer:
- Moisture-Tolerant Priming: A low-viscosity 2K primer is squeegeed and back-rolled across the floor (roughly 330 g/m²). This seals microscopic capillaries and ensures a strong chemical bond.
- Main Self-Levelling Coat: The decorative 2K epoxy base (mixed strictly at the manufacturer’s specified ratio, such as 2:1 by weight) is poured and spread at roughly 1,800 g/m².
- Deaeration & Styling: Installers walk the wet surface in spiked shoes, using a spiked roller to release any trapped air bubbles while blending highlight pigments across the main base color.
- Protective Top Coat: After the body coat cures, we apply a high-performance clear polyurethane or polyurea topcoat (approx. 100 g/m²). This final layer locks in UV resistance, adjusts the gloss level (from high-gloss to velvety matte), and protects against micro-scratches.
To explore the chemistry behind these layers in more detail, read our comprehensive epoxy flooring guide.
Avoiding Common Installation Pitfalls and Maintaining Finish Quality
Epoxy resin is a precision chemical system. While high-gloss metallic designs look straightforward on video, a successful finish requires careful environmental control and proper mixing technique.
Critical DIY Application Mistakes to Avoid
Before deciding whether is epoxy flooring worth it as a weekend DIY project or a professional installation, consider these common installation pitfalls:
- Incorrect Mixing Ratios: Resin and hardener must be mixed by weight using precise ratios. Eyeballing amounts or scraping unmixed resin from the sides of the bucket leaves sticky, uncured soft spots that will never fully harden.
- Ignoring Relative Humidity and Dew Points: Applying resin when room humidity exceeds 60% or when the substrate temperature falls below 15°C can trap moisture, causing cloudiness, amine blush, or loss of adhesion.
- Skipping the Primer Coat: Pouring self-levelling resin directly over raw concrete causes outgassing, leading to thousands of tiny popped bubbles across the surface.
- Rushing Working Times: Most 2K epoxy systems have a pot life of 20 to 30 minutes once mixed. Taking too long to pour leads to high viscosity, poor self-levelling, and visible roller lines.
Maintaining a Metallic Epoxy Floor Design for Home Longevity
Caring for an epoxy floor is remarkably straightforward because dirt has nowhere to hide.
To keep your metallic or neutral floors in peak condition over decades, follow these practical steps from our maintaining epoxy floors guide 2025:
- Daily Dust Removal: Sweep or vacuum using a soft-bristle head to remove abrasive grit, sand, and dust.
- Damp Mopping: Mop weekly using clean warm water and a pH-neutral floor cleaner. Avoid harsh bleach, citrus-based degreasers, or abrasive scouring powders that can dull the topcoat.
- Furniture Protection: Attach soft felt pads under all table legs, chairs, and heavy decorative pieces. Never drag heavy appliances across resin surfaces without protective plywood sheets.
- Entrance Mats: Place walk-off mats at exterior doors to capture coarse gravel before it gets tracked onto the floor.
Frequently Asked Questions About Residential Epoxy Floors
If you have additional technical questions about planning your home renovation, check our complete epoxy flooring FAQs for detailed advice.
Can epoxy flooring be installed directly over existing tile?
Yes, epoxy can be installed over existing ceramic or porcelain tiles, provided the tiles are structurally bonded to the concrete subfloor.
The entire tiled surface must be mechanically ground using diamond tooling to remove glazed coatings and create a CSP 2 mechanical key. We then apply an epoxy repair compound over the grout lines to create a flat subfloor before applying the moisture-tolerant primer and self-levelling decorative coats. This saves time and avoids messy, disruptive demolition.
How long does an epoxy floor take to fully cure and handle heavy traffic?
At an ambient temperature of 20°C (68°F), decorative epoxy cures according to a clear timeline:
- Light Foot Traffic: Safe to walk on in socks after approximately 24 hours.
- Furniture Placement: Light furniture can typically be returned after 48 to 72 hours.
- Full Chemical and Mechanical Cure: The resin reaches full cross-linked strength and maximum hardness after 7 days. Avoid washing the floor with water or parking heavy equipment on it during this initial week.
Are decorative epoxy floors slippery when wet?
A standard smooth, high-gloss 2K epoxy system provides a dry slip-resistance rating around R9, which is well-suited for typical indoor pedestrian foot traffic.
However, like polished marble or smooth glazed porcelain, a high-gloss resin surface becomes slippery if standing water collects on it. For wet rooms, mudrooms, and kitchens, we address this by adding ultra-fine micronized polymer spheres or aluminum oxide aggregate into the final topcoat. This provides grip underfoot without obscuring the metallic design. For a deeper breakdown of traction safety, read our guide on are epoxy floors slippery.
Transform Your Living Space with Rio Epoxy Flooring
A custom residential epoxy floor brings together practical performance, easy maintenance, and modern design. Whether you want the subtle shimmer of a neutral RAL 7015 living room or the bold visual depth of a titanium-and-pearl metallic swirl, Rio Epoxy Flooring delivers durable, showroom-quality finishes tailored to your home.
Based in Austin, Texas, our family-owned team specializes in custom residential and commercial floor transformations. We use premium low-VOC, UV-resistant materials backed by rapid 48-hour installations and a lifetime warranty for lasting peace of mind.
Ready to explore color possibilities for your upcoming home renovation? Browse our inspiration gallery of 10 stunning epoxy floor colors transform to discover how the right palette can bring your interior vision to life.