

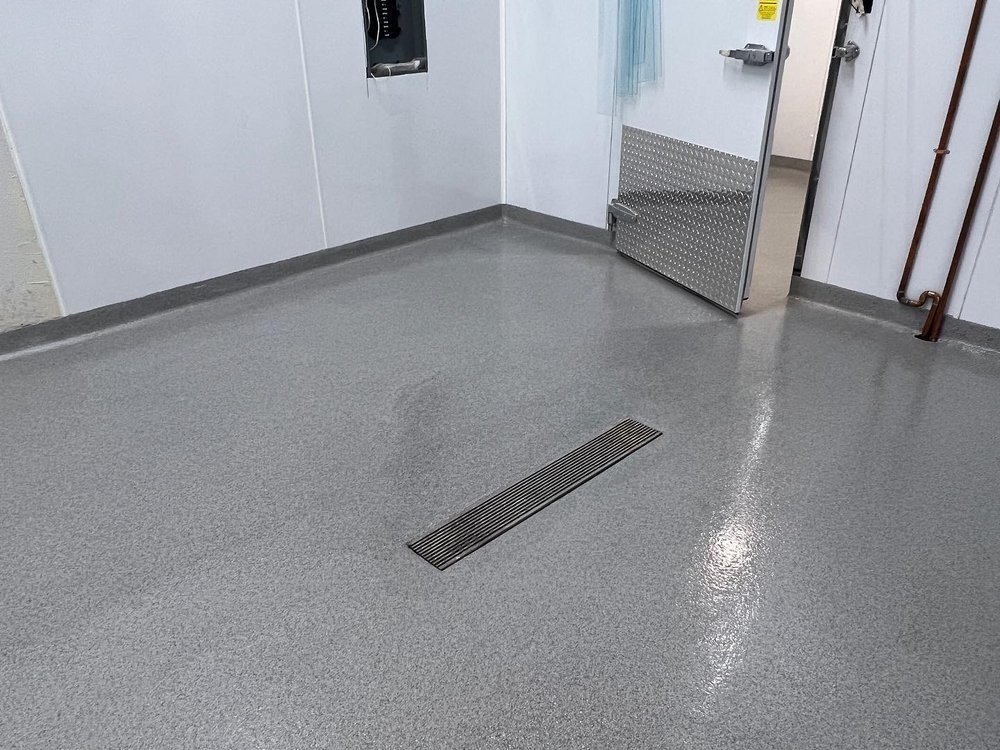
Start Your DIY Epoxy Kitchen Floor the Right Way
A DIY epoxy kitchen floor can create a seamless, stain-resistant surface that is easy to clean and built for daily spills, foot traffic, and dropped utensils. The key is not the pour – it is the prep. Before mixing any epoxy, confirm the subfloor is dry and sound, remove grease and loose material, repair cracks or chips, and mechanically profile concrete or properly abrade an existing tile surface.
For a durable kitchen result, plan the project in five phases:
- Test for moisture and fix substrate damage.
- Clean, degrease, and profile the floor for adhesion.
- Apply a kitchen-suitable epoxy primer and base coat.
- Add color or decorative flakes, then a clear protective topcoat.
- Let the floor cure fully before returning appliances and heavy furniture.
Choose a low-VOC indoor-rated system where possible, and use a topcoat with a small amount of anti-skid additive. Kitchens see water, grease, and frequent cleaning, so a smooth-looking floor still needs reliable traction when wet.
I am Roger Aguiar, an Austin-based entrepreneur and digital marketing professional with more than seven years of experience helping home-service businesses communicate practical project guidance, including DIY epoxy kitchen floor decisions. Next, learn why a kitchen epoxy system needs different planning than a typical garage-floor kit.

Epoxy Kitchen Floors vs. Garage Floors: Durability, Safety, and Food Prep
When planning your kitchen renovation, it might be tempting to grab a standard off-the-shelf garage floor kit from a local big-box hardware store. However, kitchens demand a completely different set of performance standards than garages. While garages focus heavily on hot-tire pickup resistance and vehicle oil tolerance, interior living spaces prioritize air quality, thermal dynamics, slip resistance, and food-safe hygiene.
First and foremost is indoor air quality. Standard solvent-based garage epoxies off-gas heavy volatile organic compounds (VOCs) that can linger inside a home for weeks, embedding into cabinetry, drywall, and furniture. For an indoor space, evaluating low VOC epoxy flooring benefits is critical. Modern 100% solids or waterborne formulations provide the necessary structural strength without releasing toxic fumes into living and dining zones.
Another critical factor is thermal shock and organic chemical resistance. Dropping boiling pasta water, spilling hot cooking oils, or splashing acidic tomato sauce will quickly degrade a low-grade garage coating. High-performance interior systems create an impenetrable surface that resists thermal stress and acidic etching.
Unlike traditional tile surfaces that trap grime, mildew, and bacteria within porous grout lines, an interior seamless coating acts as a continuous antimicrobial shield. When evaluating epoxy flooring vs tiles, the absence of grout lines makes daily sanitation vastly simpler, requiring only warm water and a neutral cleaner to maintain a clean food prep environment.
| Feature | Garage Epoxy Systems | Kitchen Epoxy Systems |
|---|---|---|
| Primary Stressors | Vehicle traffic, road salts, hot tire pickup | Thermal shock, grease spills, dropped utensils |
| VOC Formulation | Standard or solvent-borne (outdoor/ventilated) | Low-VOC or 100% solids (indoor-safe) |
| Hygiene Standards | Industrial dust containment | Seamless, non-porous antimicrobial barrier |
| Texture Requirement | Coarse aggregate for wet tire grip | Fine anti-skid additive for barefoot/sock safety |
| UV & Heat Stability | Moderate thermal resistance | High thermal tolerance for hot liquids and grease |

Preparing the Kitchen Substrate and Managing Moisture
The success of any coating project depends entirely on substrate preparation. More than 80% of coating failures, including delamination and peeling, stem directly from improper surface prep or unaddressed moisture vapor transmission beneath the slab.
Begin by assessing your subfloor:
- Direct Concrete Slabs: Ensure the slab is structurally sound, clean, and free of old paints or curing compounds.
- Old Tile Substrates: If you are coating over existing ceramic or porcelain tiles, check for loose pieces. Hollow-sounding or loose tiles must be removed and patched flat with an epoxy repair mortar.
- Linoleum or Sheet Vinyl: Always remove vinyl sheet goods and thoroughly scrape away old mastic and adhesive residues down to bare concrete.
Next, address moisture vapor emissions. Concrete is naturally porous, acting like a hard sponge that pulls groundwater up via capillary action. If moisture vapor rises against an impermeable epoxy film without a barrier, the hydrostatic pressure will pop the coating right off the concrete. This behavior is identical to issues seen when assessing epoxy basement flooring Texas moisture cost, where moisture vapor barriers are essential.
Perform a simple plastic sheet test or an ASTM F1869 calcium chloride test before proceeding. If moisture levels exceed 3 lbs per 1,000 sq. ft. over 24 hours, apply an epoxy moisture vapor barrier primer before your base coat.
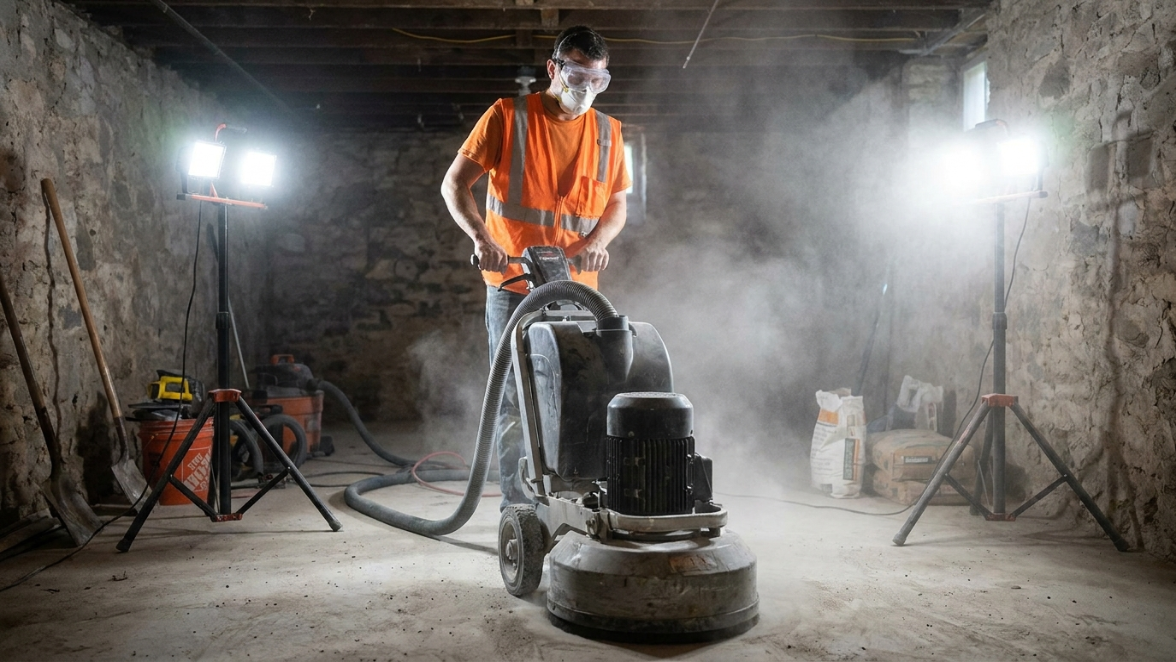
To guarantee mechanical adhesion, concrete must be mechanically ground using a diamond cup wheel or planetary floor grinder to achieve a Concrete Surface Profile (CSP) of 2 to 3 (comparable to 60-grit sandpaper). Chemical acid etching is rarely sufficient for indoor spaces because it introduces excess water into the home and fails to open tightly troweled indoor slabs properly.
Once profiled, inspect the slab for cracks, spalls, and chips. Fill dynamic hairline cracks and divots using a two-part rigid epoxy crack repair paste, screeding it completely flush with the surrounding concrete.
Step-by-Step Guide to Applying a DIY Epoxy Kitchen Floor
Once your substrate is clean, dry, profiled, and vacuumed with a HEPA system, you are ready to begin the coating application. Applying epoxy indoors requires strict attention to timing and methodical execution.
Before opening containers, tape off your baseboards, cabinet toe-kicks, and doorways using premium painter’s tape. Plan your exit route so you do not paint yourself into a corner away from the doorway. If you are exploring broader residential epoxy flooring solutions, this same careful process applies to hallways, basements, and utility rooms.
- Environmental Check: Ensure room temperature stays between 65°F and 80°F with humidity under 75%.
- Moisture-Blocking Primer: Roll out a dedicated concrete bonding primer and allow it to tack up or cure per instructions (usually 4 to 8 hours).
- Batch Mixing: Carefully mix Part A (resin) and Part B (hardener) using a variable-speed drill with a spiral paddle mixer at low speed (300 RPM) for 3 full minutes. Avoid high speeds, which whip air into the liquid and cause bubbles.
- Pot Life Management: Epoxy produces an exothermic chemical reaction; left in the mixing bucket, it will heat up quickly and flash-cure. Immediately pour the mixed liquid onto the floor in long ribbons.
- Spreading and Back-Rolling: Wear spiked shoes to walk across the wet floor. Spread the material evenly using a 1/8-inch or 3/16-inch notched squeegee, then back-roll perpendicular to your spread lines with a lint-free 3/8-inch nap roller.
- Degassing Trapped Air: Concrete naturally outgasses air as the liquid settles. Lightly sweep an open flame from a propane torch or run a heat gun across the wet epoxy 10 to 15 minutes after rolling to pop surface air bubbles.
Essential Materials and Kit Selection for a DIY Epoxy Kitchen Floor
To achieve professional longevity, avoid thin water-based paints and invest in a high-grade 100% solids two-component epoxy kit. 100% solids formulas do not shrink as they dry, yielding a thick, durable, and impact-resistant build.
When choosing a design, review 10 stunning epoxy floor colors transform for pigment combinations ranging from modern slate gray and warm taupe to bold decorative swirls.
Required Tools and Safety Gear Checklist:
- Low-VOC 100% solids epoxy base kit (Part A & Part B)
- Epoxy primer/vapor blocker
- Organic vapor respirator mask (NIOSH-approved)
- Chemical-resistant nitrile gloves and eye protection
- Variable-speed drill with helical paddle mixer
- Notched squeegee and extension pole
- 3/8-inch shed-resistant microfiber roller covers and heavy-duty frame
- Professional spiked shoes
- Heat gun or propane torch (for bubble release)
- Clean 5-gallon mixing buckets
Broadcasting Flakes and Adding Slip Resistance
Decorative vinyl color chips (flakes) add visual depth, conceal minor substrate imperfections, and provide baseline texture.
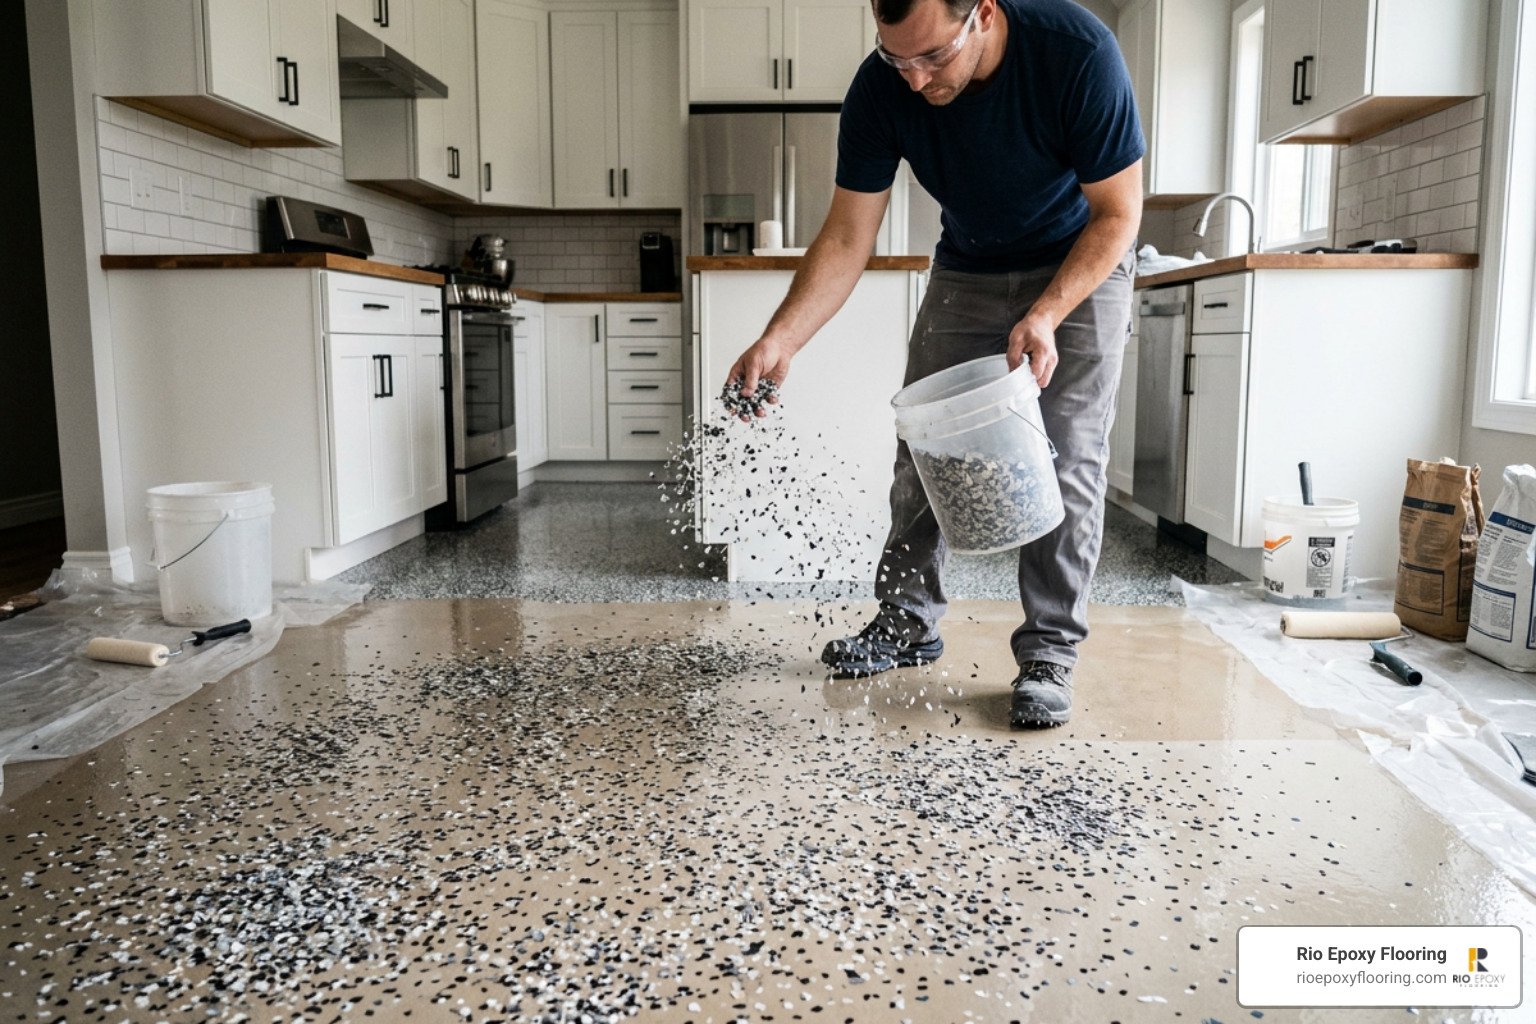
You can choose between a light broadcast (sparse speckling), a medium broadcast, or a full broadcast (where flakes are tossed until rejection, completely covering the base epoxy color). For a full broadcast, you will need approximately 0.15 to 0.20 pounds of flakes per square foot; a light broadcast requires only 0.02 to 0.05 pounds per square foot.
To broadcast flakes, toss small handfuls underhand high up into the air, allowing them to rain down evenly onto the wet base coat. Never throw flakes directly down, as this creates clumpy clusters.
Safety is vital in a kitchen where liquid spills happen regularly. To understand traction dynamics, consider the question: are epoxy floors slippery? Without texture, smooth high-gloss epoxy can become slick when wet with grease or water. To maintain reliable slip resistance without creating a rough floor that catches mop strings, incorporate a fine micronized polymer grit or aluminum oxide anti-skid additive into your final clear topcoat.
Top Coat Application and Curing Timelines
Never skip the clear protective topcoat. While the base epoxy provides strength and adhesion, the topcoat protects against scratches, UV yellowing, and abrasive wear.
For kitchen spaces, a high-wear clear polyaspartic or polyurethane topcoat is recommended over standard epoxy clear coats because of its superior scratch resistance and chemical durability. Apply the topcoat using a flat squeegee and back-roll with a short-nap roller to ensure a uniform film thickness.
Cure timelines must be followed strictly:
- Light Foot Traffic (Socks only): 24 hours after topcoat application.
- Normal Footwear Traffic: 48 hours.
- Heavy Furniture & Appliance Load: Minimum 72 hours (ideally 5 to 7 days for full chemical cure).
For comprehensive care guidance after installation, reference our maintaining epoxy floors guide 2025 to keep your new floor pristine.
Long-Term Maintenance and Avoiding Costly Mistakes
Once fully cured, an epoxy kitchen floor is exceptionally low-maintenance, but preserving its mirror-like finish requires the right daily practices.
- Daily Dusting: Sweep or microfiber-dust mop daily to remove abrasive grit, dirt, and crumbs that can dull the gloss over time.
- Routine Mopping: Use a microfiber mop with warm water and a pH-neutral cleaner. Avoid citrus-based, ammonia, or vinegar solutions, which can etch protective topcoats over time.
- Stain Clean-Up: Wipe up hot grease, wine, mustard, and coffee spills promptly.
- Surface Protection: Place felt protector pads under all kitchen chairs, barstools, and table legs to prevent point-load gouging.
Understanding environmental variables is equally important. High ambient temperatures cause coatings to cure prematurely during application, while thermal shifts can challenge bonded surfaces. Understanding does epoxy flooring peel crack Texas summer heat illustrates why consistent indoor climate control (keeping the space between 68°F and 75°F) is essential during application and long-term use.
Common Mistakes to Avoid on a DIY Epoxy Kitchen Floor
Avoid these common mistakes that lead to floor coating failures:
- Inadequate Profiling: Applying epoxy over glossy, unground concrete or un-abraded tile will cause the coating to sheet off under daily foot traffic.
- Ignoring Concrete Moisture: Trapped moisture creates hydrostatic pressure, forming fluid-filled blisters beneath the resin film.
- Exceeding Pot Life: Leaving mixed epoxy in the bucket for more than 15 minutes causes it to thicken rapidly, leading to roller marks and poor leveling.
- Trapping Degassing Bubbles: Failing to pass a heat gun over wet epoxy traps rising air pockets, leaving pinholes and craters across the floor.
- Rushing Appliance Placement: Moving heavy refrigerators or ranges back onto the floor before the full 72-hour cure window will permanently indent or gouge the fresh surface.
Frequently Asked Questions About Kitchen Epoxy Floors
How long do I have to wait before moving heavy appliances back into the kitchen?
You should wait a minimum of 72 hours before moving heavy appliances like refrigerators, dishwashers, and ranges back onto your new floor. While epoxy may feel dry to the touch after 24 hours, its cross-linking chemical cure requires several days to achieve full compressive strength (over 10,000 PSI).
When sliding appliances back into place, always use hardboard runners (such as 1/8-inch Masonite sheets) or heavy-duty appliance air-sleds, and install felt glide pads on all appliance leveling legs to prevent gouges.
Can you apply epoxy directly over existing ceramic or porcelain kitchen tile?
Yes, but it requires thorough mechanical preparation. Epoxy cannot bond to the smooth, glazed surface of ceramic or porcelain tile.
You must mechanically abrade the tile surface using a diamond grinder to remove the glaze and create a rough mechanical profile. Grout lines must be thoroughly cleaned, degreased, and filled flush with an epoxy patch paste to prevent “telegraphing” (where the grid pattern of grout lines remains visible through the topcoat). Finally, apply a high-adhesion epoxy bonding primer before your color coat.
How much does a DIY kitchen epoxy installation cost compared to hiring a professional?
A typical 200 sq. ft. DIY kitchen epoxy project generally costs between $500 and $1,100 for commercial-grade 100% solids materials, primer, decorative flakes, topcoat, and tool rentals (grinder, squeegees, safety gear).
In contrast, professional installation typically ranges from $1,400 to $2,800 depending on substrate repairs, customized metallic pigments, and vapor mitigation needs. Considering that a properly prepped and installed epoxy floor lasts 20 to 30 years without grout replacement or tile cracking, assessing is epoxy flooring worth it reveals an outstanding return on investment for homeowners.
Conclusion
A DIY epoxy kitchen floor is an achievable home improvement project that delivers a commercial-grade, hygienic, and stunning finish. By taking the time to mechanically profile the substrate, managing moisture vapor emissions, working carefully within the product’s pot life, and finishing with an anti-skid topcoat, you can transform your kitchen into a durable showpiece that resists spills and heavy foot traffic for decades.
For high-volume culinary settings or complex layouts, our team at Rio Epoxy Flooring specializes in high-performance installations. Explore how our heavy-duty epoxy flooring for commercial kitchens delivers seamless sanitation and long-term durability for demanding cooking environments across Texas.