

Benefits of Installing a Flake Epoxy Kitchen Floor
A flake epoxy kitchen floor is one of the smartest investments for modern homeowners because it delivers commercial-grade impact resistance, 100% seamless waterproofing, exceptional stain defense, and a custom decorative finish that lasts 10 to 20+ years. Unlike traditional kitchen floors that rely on porous grout lines, easily dented hardwoods, or seam-vulnerable luxury vinyl, a resinous flake floor bonds permanently to your concrete foundation to create an impervious, ultra-durable culinary workspace.
Kitchen floors endure more punishment than almost any other surface in your home. Between hot oil splatters, dropped cast-iron skillets, spilled wine, and constant foot traffic, standard flooring materials quickly show their age. Grout lines discolor and harbor bacteria, hardwood planks warp or dent under heavy moisture, and vinyl planks can peel or trap moisture underneath.
Installing a seamless flake floor eliminates these vulnerabilities. Because the resin cures into a solid, non-porous surface, liquids cannot penetrate beneath the coating. You get maximum stain resistance against acidic liquids like tomato sauce, coffee, and lemon juice, alongside unmatched impact tolerance when heavy cookware takes an accidental tumble.
| Feature | Flake Epoxy System | Ceramic / Porcelain Tile | Hardwood / Engineered Wood | Luxury Vinyl Plank (LVP) |
|---|---|---|---|---|
| Grout Lines | None (100% seamless) | Porous lines require sealing | None (plank seams exist) | Water-vulnerable seams |
| Stain Resistance | Exceptional (non-porous) | High tile, low grout | Low to moderate | Moderate to high |
| Impact Tolerance | Extremely high | Brittle (cracks easily) | Prone to dents/scratches | Moderate |
| Moisture Barrier | Full concrete seal | Water can seep past grout | Highly sensitive to water | Water-resistant surface only |
| Lifespan | 10–20+ Years | 10–15 Years (grout fails) | 15–25 Years (needs refinishing) | 5–10 Years in busy kitchens |
To learn more about how resinous systems compare across various living spaces, check out our comprehensive epoxy flooring guide.
Slip Resistance and Safety Dynamics
Kitchens are wet zones by nature. Whether it is steam condensing near the stove, an ice cube melting unnoticed, or water splashing from the sink, slip resistance is a critical safety consideration.
Plain, high-gloss epoxy can become slick when wet. However, broadcast polymer flakes introduce a light, orange-peel texture profile throughout the surface that naturally boosts wet traction. For households needing even higher safety margins, we incorporate aluminum oxide or fine polymer non-skid additives directly into the topcoat. If you are wondering about the exact traction differences, read our guide on are epoxy floors slippery? to understand how texture profiles prevent kitchen falls while maintaining effortless cleanability.
Seamless Aesthetics and Concrete Concealment
Concrete slabs rarely stay perfect. Settling, hairline shrinkage cracks, minor spalling, and surface pitting are common in residential foundations. If you lay thin tile or vinyl over an uneven slab, those imperfections can cause hollow sounds, loose tiles, or telegraph through the material.
A full-broadcast flake system acts as both a structural filler and a visual camouflage. The base epoxy fills fine cracks, while the multi-colored vinyl chips break up light reflection, completely disguising minor substrate flaws. The finished aesthetic closely mimics high-end granite or poured terrazzo at a fraction of the cost.
Complete Multi-Layer System and Installation Overview
A high-performance kitchen coating requires a methodical, multi-layer application. We do not use thin paint kits; our process bonds chemical resins directly into the concrete pores for permanent adhesion.

For a detailed look at our full professional installation process across Texas homes, explore our epoxy flooring installation guide.
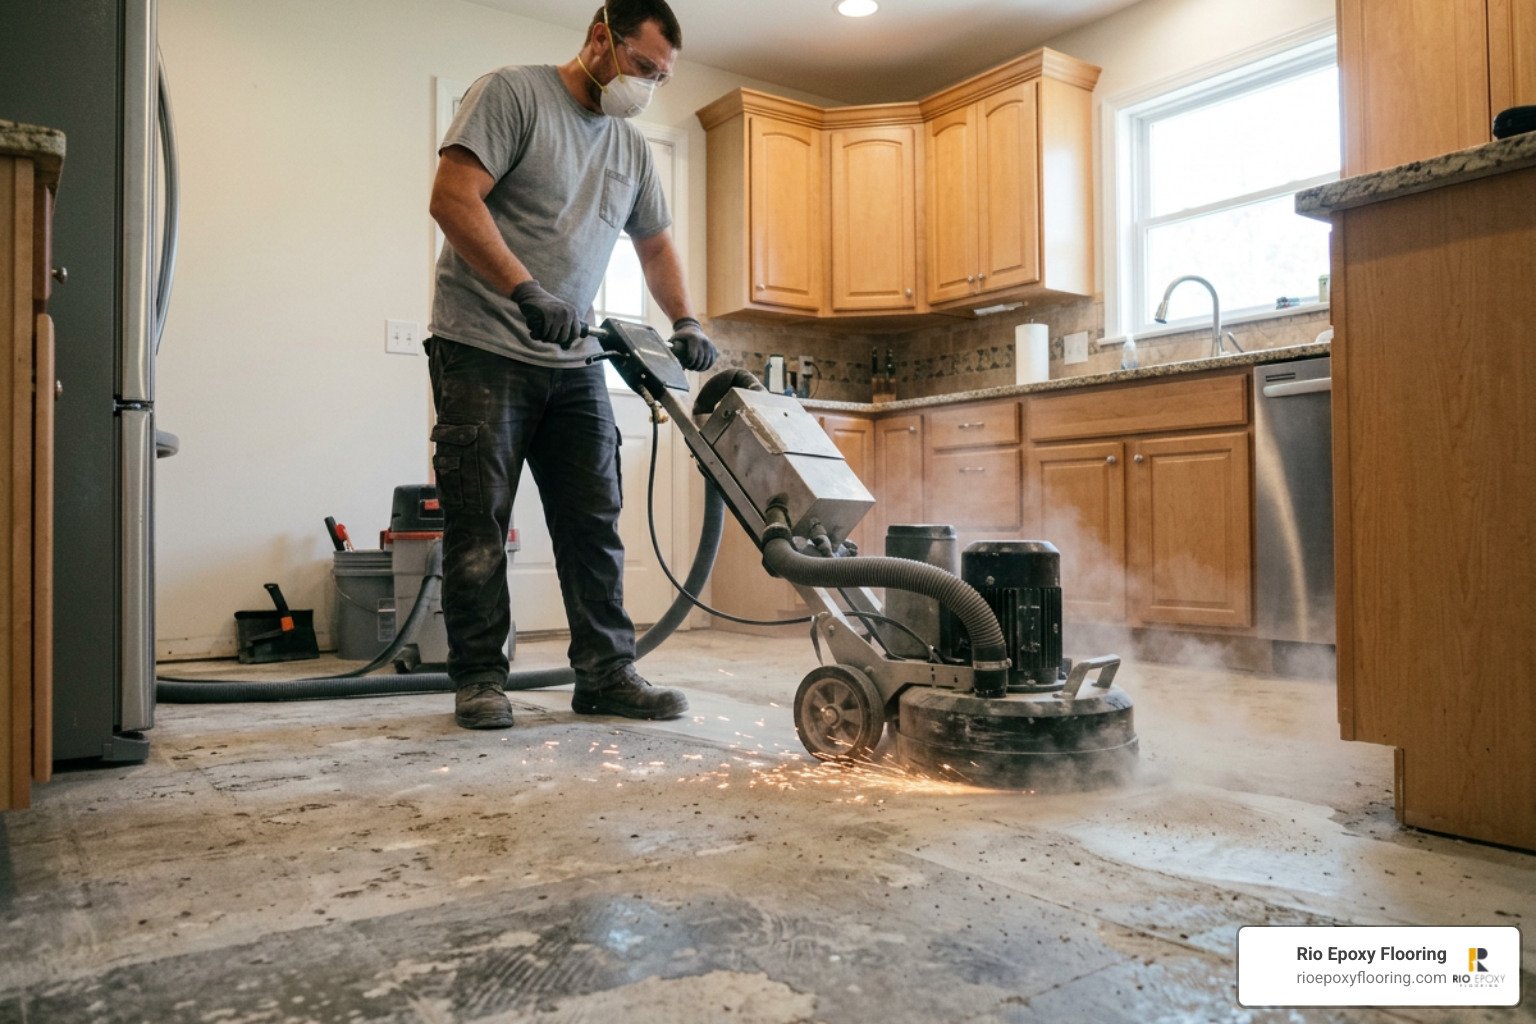
Preparing Concrete for a Flake Epoxy Kitchen Floor
Surface preparation is the single most important step in the entire project. Skipping mechanical prep is why cheap DIY roll-on kits fail within 3 to 7 years.
- Mechanical Grinding: We use heavy diamond-head floor grinders connected to HEPA dust extractors to open the concrete pores, creating an optimal Concrete Surface Profile (CSP 2–3).
- Moisture Testing & Mitigation: We test the slab for hydrostatic pressure and relative humidity to verify moisture levels before application, preventing future delamination.
- Crack and Pit Repair: Any existing gouges, control joints, or hairline fractures are filled with a fast-curing epoxy patch gel and ground flush with the surrounding concrete profile.
- Surface Decontamination: The surface is thoroughly cleaned and vacuumed. When wiping down surfaces, we use 91% isopropyl alcohol rather than acetone to leave zero residue behind.
Base Coat Application, Flake Broadcast, and Clear Topcoats
Once prepped, the floor receives a high-solids moisture-mitigating epoxy base coat that deeply penetrates the open concrete pores. While this pigmented base coat remains wet and tacky, we broadcast decorative vinyl chips across the entire surface until rejection—meaning the floor is completely covered and no base color shows through.
After the base coat cures:
- Excess loose flakes are swept up.
- The floor is scraped with flat steel blades in multi-directional passes to flatten any standing flakes and refine the walking texture.
- The area is vacuumed spotless.
- We apply a high-solids clear polyaspartic topcoat.
Polyaspartic topcoats cure rapidly, resist hot tire pickup, block yellowing from direct sunlight streaming through kitchen windows, and resist harsh household chemicals, oils, and cleaning agents.
Kitchen Aesthetics: Choosing Flake Sizes, Blends, and Coverage

Flake flooring allows complete aesthetic control over your kitchen’s palette, whether you want an airy Scandinavian vibe, a warm rustic farmhouse tone, or a sleek industrial look.
Customizing Your Flake Epoxy Kitchen Floor
When designing your floor, you have several primary options for flake sizing and distribution:
- 1/4-Inch Chips: The industry standard. This size delivers a bold, traditional terrazzo look that excels at hiding dust, pet hair, and minor slab variations.
- 1/8-Inch Chips: A tighter, more refined pattern that resembles finely ground granite. It creates a subtle, modern aesthetic for contemporary minimalist kitchens.
- Hybrid Blends: Specialty blends that incorporate natural mica minerals, stone chips, or metallic accents for added dimensional depth. High-end polymer blends, such as Klondike Flake – Stone Coat Countertops, offer striking multi-tone depth that complements granite and quartz countertops.
For long-term kitchen durability, we always recommend a full broadcast density. This requires roughly 0.25 pounds of flake per square foot (or roughly 12% of the room’s total square footage in pounds of flakes). A full broadcast ensures consistent texture, hides concrete imperfections, and forms a thick, protective wear barrier beneath the clear topcoat.
Care, Cleaning, and Longevity in Kitchen Environments
Maintaining a flake epoxy floor is straightforward because dirt and grease have nowhere to hide. Without grout lines to scrub with a toothbrush, your routine cleaning takes minutes:
- Daily Sweeping or Dust Mopping: Use a soft microfiber dust mop or broom to remove loose dirt and crumbs.
- Weekly Damp Mopping: Mop with warm water and a pH-neutral cleaner. Avoid harsh acid-based cleaners, citrus-based degreasers, or abrasive scouring powders, which can dull the clear topcoat over time.
- Quick Spill Management: Wipe up grease, cooking oils, wine, and vinegar promptly. While the polyaspartic topcoat is chemical-resistant, clearing spills prevents slip hazards.
- Furniture Protection: Place felt pads beneath the legs of kitchen barstools, islands, and heavy dining tables to avoid scratching the surface when sliding furniture.
With basic care, a professional multi-layer system will last 10 to 20+ years without peeling or fading. For deeper maintenance insights, read our Texas homeowner guide on how to maintain epoxy floors.
Frequently Asked Questions About Kitchen Epoxy Flooring
For additional details on our materials and warranties, visit our general epoxy flooring FAQs.
How long does an epoxy flake kitchen floor last?
A professionally installed epoxy flake system utilizing a moisture-mitigating primer, 100% solids epoxy base, full flake broadcast, and a polyaspartic topcoat easily lasts 10 to 20+ years. In contrast, basic single-layer DIY kits typically begin peeling, chipping, or wearing thin in high-traffic kitchen zones within 3 to 7 years.
How much does kitchen flake epoxy flooring cost?
Pricing depends on your kitchen’s square footage, the current condition of your concrete slab, required crack repairs, and the specific topcoat chemistry chosen. Complete DIY material kits for standard spaces often start around $1,054 for up to 600 square feet, while full turnkey professional installation offers better long-term value, lifetime bonding, and zero equipment rental hassle. To see localized pricing details, check our guide on epoxy flooring cost.
What is the curing timeline before kitchen floors can be used?
Thanks to fast-curing polyaspartic topcoats, the downtime is minimal:
- Light foot traffic: Permitted within 24 to 36 hours after the final topcoat application.
- Setting furniture and light appliances: Typically safe after 48 to 72 hours.
- Heavy appliances and full chemical cure: Allow a full 7-day cure window before sliding heavy refrigerators or ranges into position.
Conclusion
Upgrading your kitchen with a flake epoxy system delivers the perfect blend of modern style, effortless hygiene, and commercial-grade strength. You no longer have to worry about stained grout lines, dropped pots cracking your floor, or water leaks damaging your foundation.
At Rio Epoxy Flooring, we specialize in high-durability residential transformations as well as heavy-duty epoxy flooring for commercial kitchens. Our family-owned Austin team uses premium, low-VOC, UV-resistant materials backed by rapid 48-hour installations and a lifetime warranty. Contact us today to design a kitchen floor built to withstand a lifetime of culinary memories.